
My car, a 1978 Jaguar XJ-S inexplicably came equipped with only front speakers. In addition the qualities of the front speakers were marginal to say the least. This project was to replace the front speakers and install proper rear speakers. First, purchase a quality radio that supports at least four speakers. Then purchase four quality speakers in sizes that will fit this project.
The easy part was the replacement of the front speakers. They were replaced by removing the door panel and installing new speakers. (photographs below).


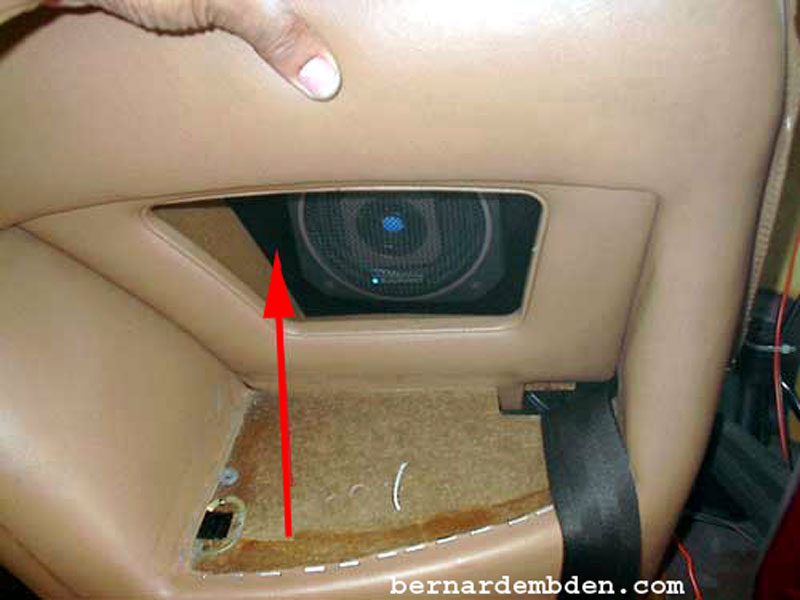
The rear speakers presented a problem. The only logical place to install them was the side "bins" beside the rear seats. First, remove the rear seat, arm rest and the Philips head screws.
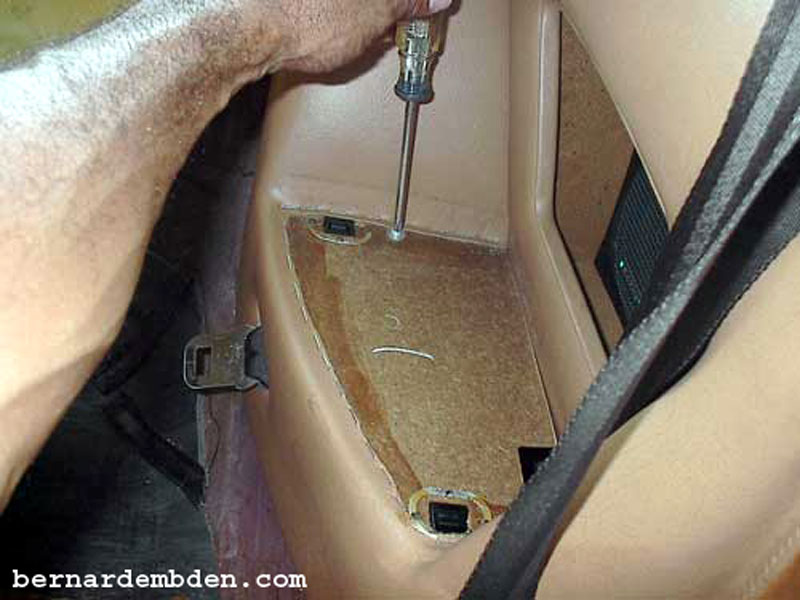
Remove shoulder belt attachment screws.

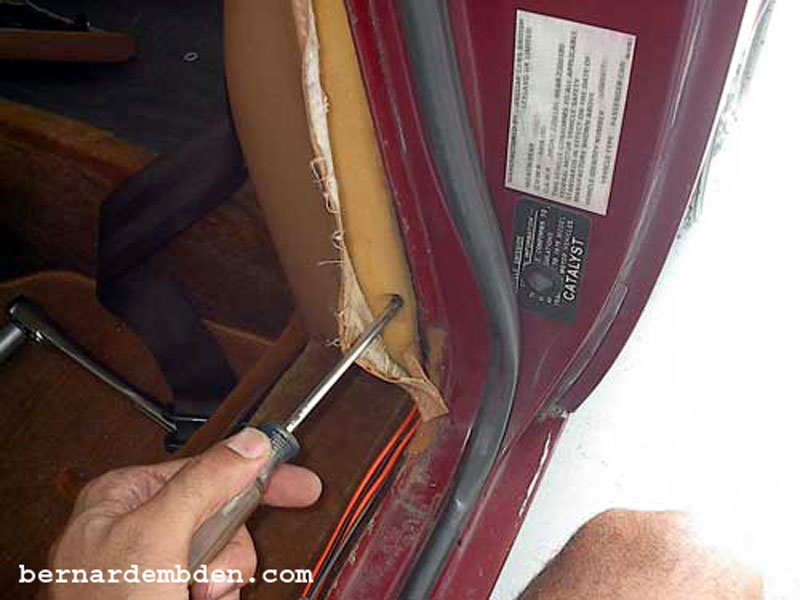
(Photograph below) Peel back the leather covering and remove small Philips screw. Note the wires along the doorsill. These are the wires for the new rear speakers.
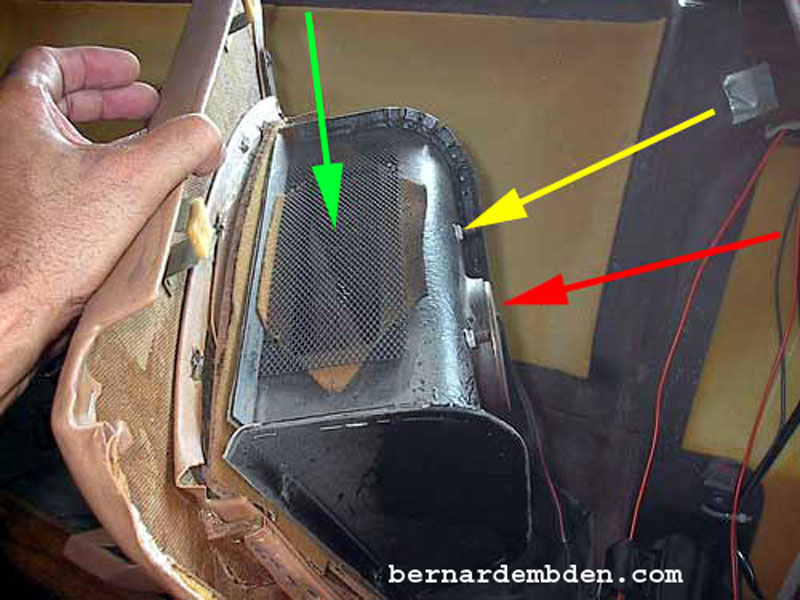
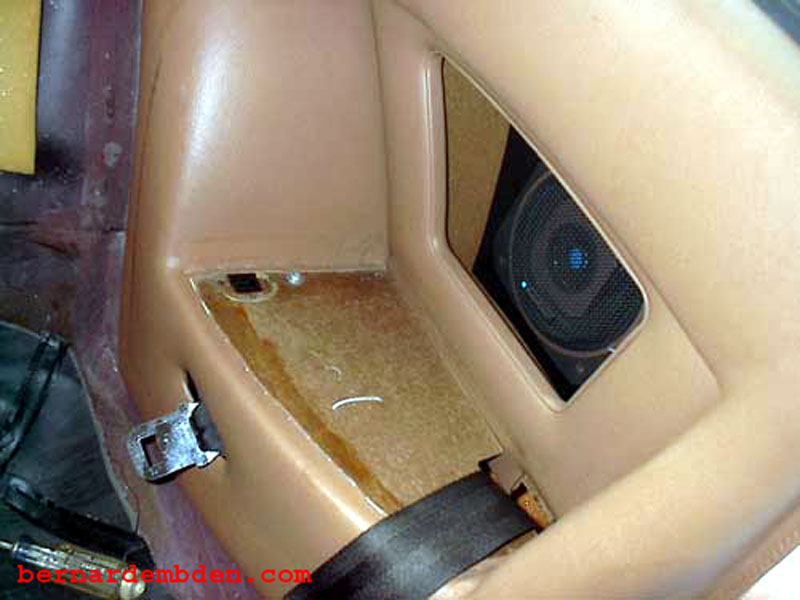
(Photograph below) I fabricated a support plate for the rear speaker out of aluminum stock. I bolted the speaker to the plate and installed the assembly in the side bin. (yellow arrow). In order to retain the depth (and therefore the usefulness) of the bin, the speaker magnet (red arrow) was installed through a hole cut in the bin assembly. Note the mesh on top of the bin. (green arrow). This is part of the "flow through" ventilation system. It should not be blocked off.
In the photograph below, yellow arrows indicate the mounting bolts. The speaker magnet was sealed to the bin assembly with caulk.
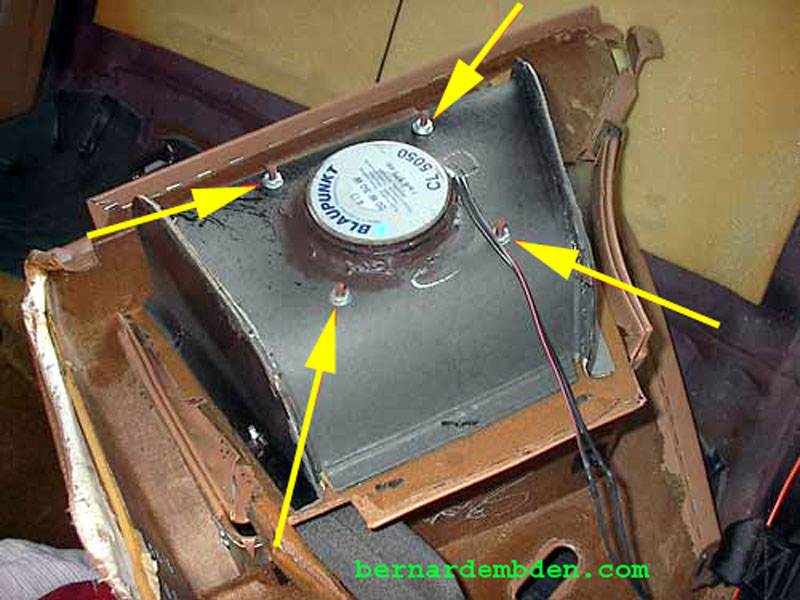
Aluminum support plates (red arrow photographs below) were painted black.
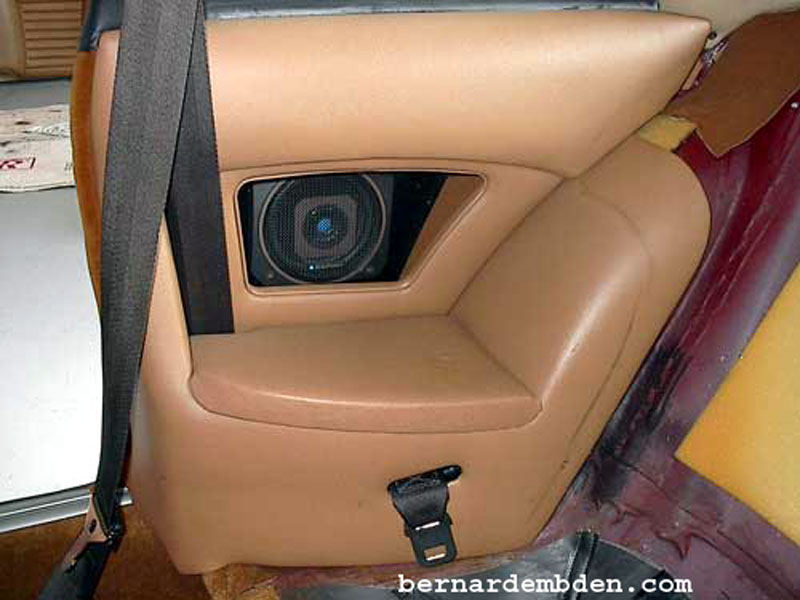
Connect wires and install side bins and rear seat. Your project should look like the photograph below.
Project complete. If done properly the radio and rear speakers will sound and look terrific.
