
I needed a new radiator for my 1978 Jaguar XJ-S. This year radiator is no longer available. I would have to install a later model radiator.
On the Jaguar Pre-HE's the radiator is attached to, and supports, the oil cooler. They must be removed as a single unit. This is a real PIA. Once the radiator and oil cooler assembly is removed, they must be separated to facilitate mounting them separately.
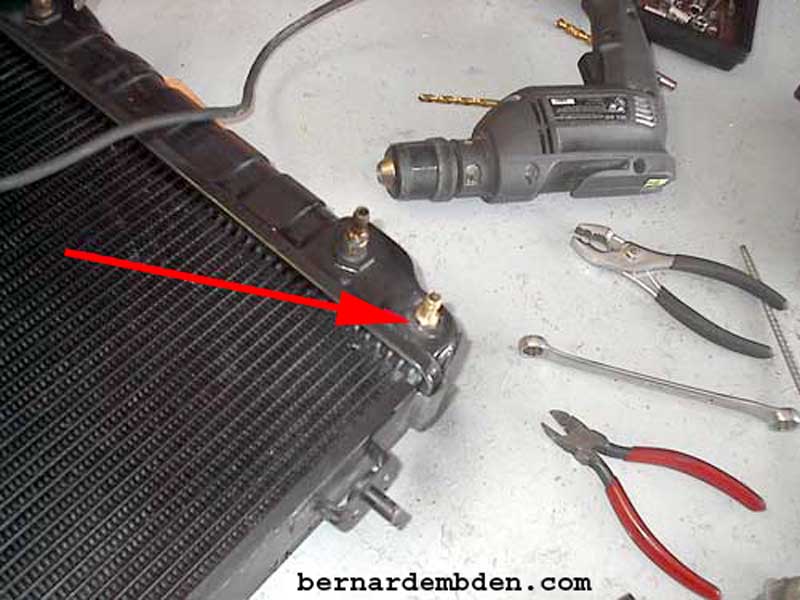
The later style radiator does not support the oil cooler, therefore, support brackets must be fabricated to locate and support the oil cooler independent of the radiator. Below is a picture of the right side bracket I fabricated. (yellow arrow) The left side is identical.
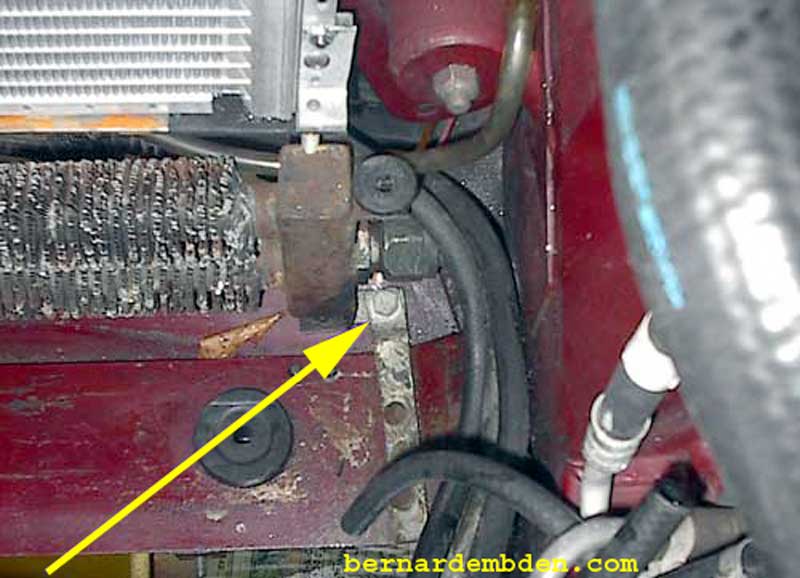
Even if you are not replacing the radiator, If the radiator is removed for any reason, I urge you to consider this modification. You will thank me the next time you have to remove the radiator.
The later style radiator is the same size externally as the Pre-HE's. however it differs in six important areas.
1) The oil cooler mounting. There is no support for the oil cooler. Support brackets must be fabricated
2) The transmission cooler fittings are screwed in, not hose and clamp fittings.
3) The low coolant switch has been moved from the radiator to the expansion tank.
4) There is no drain plug. The lower hose must be detached to drain the radiator.
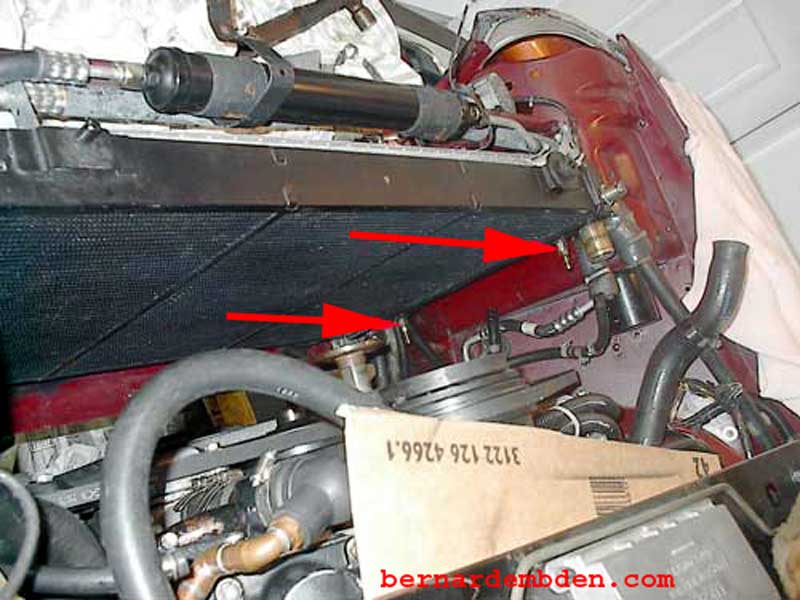
5) The bleed system. Although the radiator has two bleed fittings, identical to the Pre-HE's, these side tank fittings, (that connects to the banjo and bleed connections) appears to be located lower and are angled than those on the original Pre-HE radiator. (more on this later)
6) The number of rows, and width of the radiator. The Pre-HE's radiator has four rows, the 1990 radiator has three. The three rows however appear to be larger than the Pre-HE's. Therefore radiator widths (and capacity) appear be virtually identical.
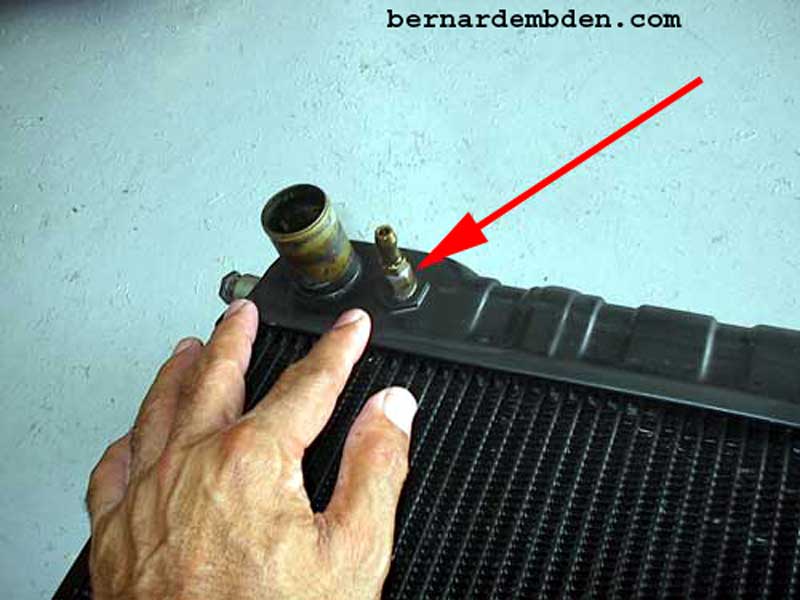
The first project is to modify the expansion tank to accept the "low coolant" sensor. Drill the correct size hole approximately 1 inch from the bottom of the tank and install a new sensor. (yellow arrow photograph below). Note that the old sensor, if good, can be reused. Do not reuse the old coolant sensor grommet. The grommet is part # C-43221 and coolant switch part # C-43222). Be sure to remove air bleed tap from left side of old radiator and install in new radiator.
Also note that the right side bleed fitting is lower on the non-original Jaguar 1990 radiator than on the original Pre-HE radiator. With the stock spacer there is not enough space between the banjo fitting and the radiator top assembly. A spacer for the 1990 XJ-S radiator, part number CAC-4559, from the dealer is longer than the original spacer # CAC-4559. However the new spacer does not leave enough thread to adequately screw into the radiator bleed flange. (First spacer on bleed screw in picture below approximates the banjo fitting height). Since the length of the banjo bolt is unchanged my solutions were :
File a groove in the radiator top assembly to clear the banjo fitting bleed pipe ;
Machine or grind down the longer spacer ;
Fabricate a new spacer.
My solution was to fabricate a new spacer to the correct height. (blue arrow photograph below).
![]()
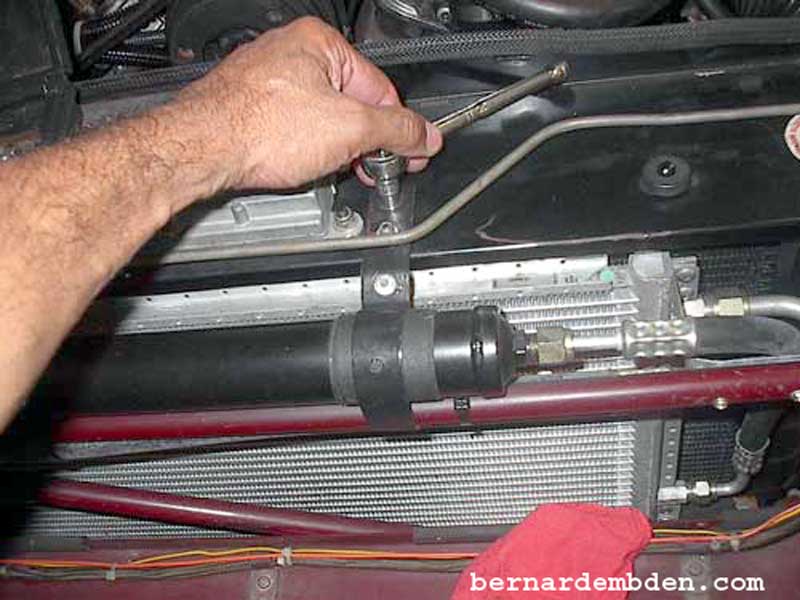
The next process is to transition the radiator's new style transmission cooler fittings to the hose clamp design of the Pre-HE. Any decent automotive shop should have the necessary hardware. I soldered two fittings together to achieve the desired result. (photographed below red arrow)
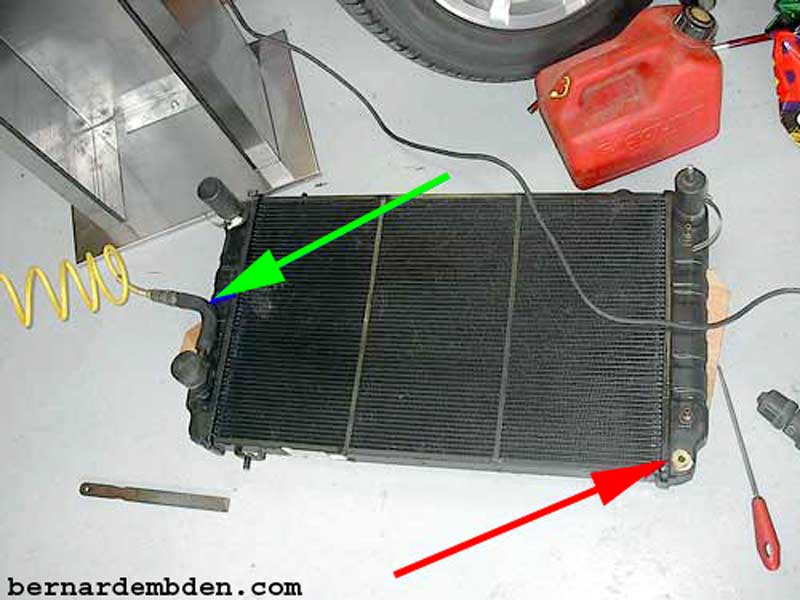
The lack of a drain petcock on the new radiator is inexcusable. Removing the lower radiator hose to drain the radiator is almost impossible and can be life threatening. I decided to modify the radiator by soldering a fitting in the lower right side tank. (yellow arrow photograph below)
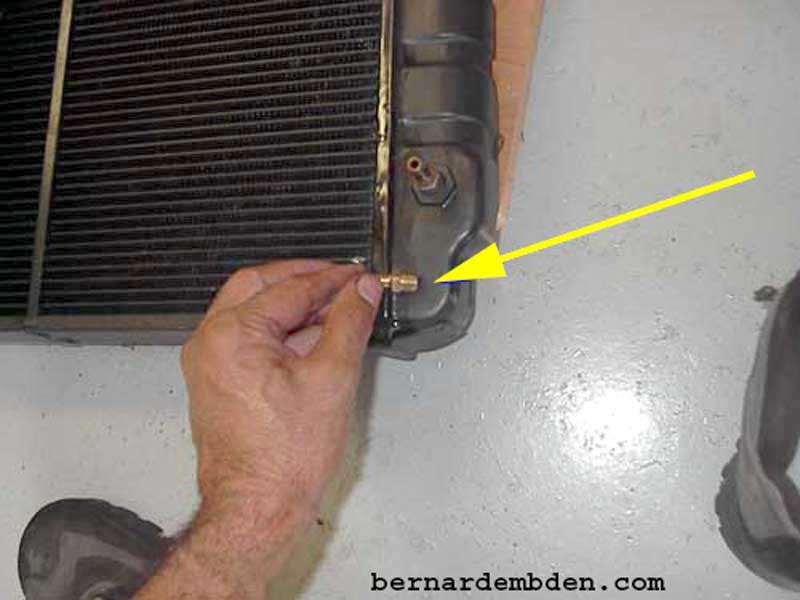
Clean the radiator tank with sandpaper. Take your time; you need to get down to bare metal. Note fitting (red arrow).
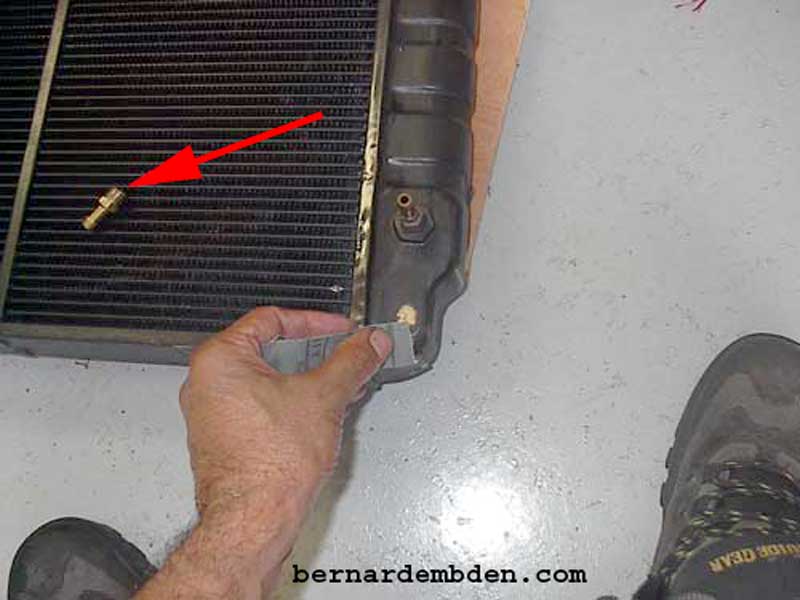
The issue with drilling a hole in the radiator side tank is that debris will fall into the radiator. This is never good. I had two options.
1) Suspend the radiator and drill the hole upside down.
2) Pressurize.
I pressurized.
In the photograph below, I blocked off the radiator's inlet and outlet. I then pressurized the radiator with 15 pounds of air (green arrow). The pressured radiator ensured that any drill or file debris would not fall into the radiator tank during the drilling process. (red arrow).
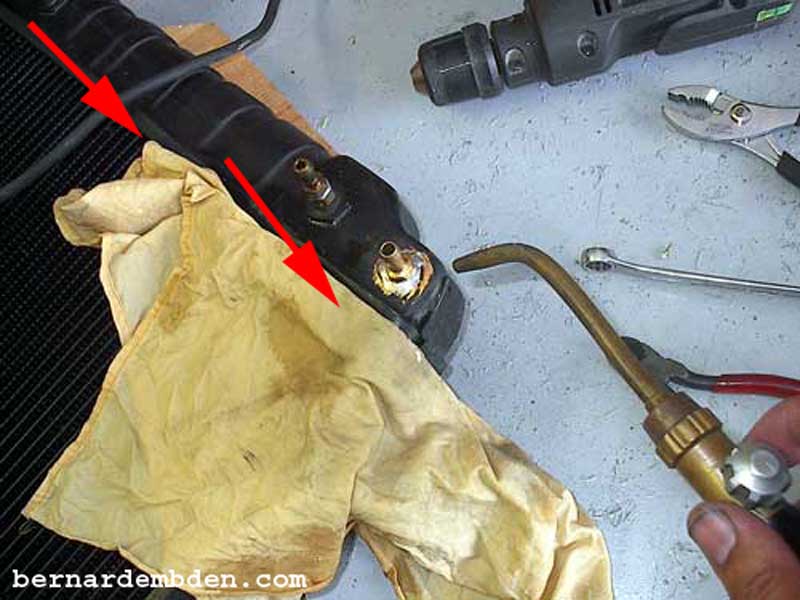
Using a wet rag as a heat soak (red arrows photograph below) I soldered the fitting.
You should have some experience in soldering before attempting this. The radiator could be compromised with too much heat.
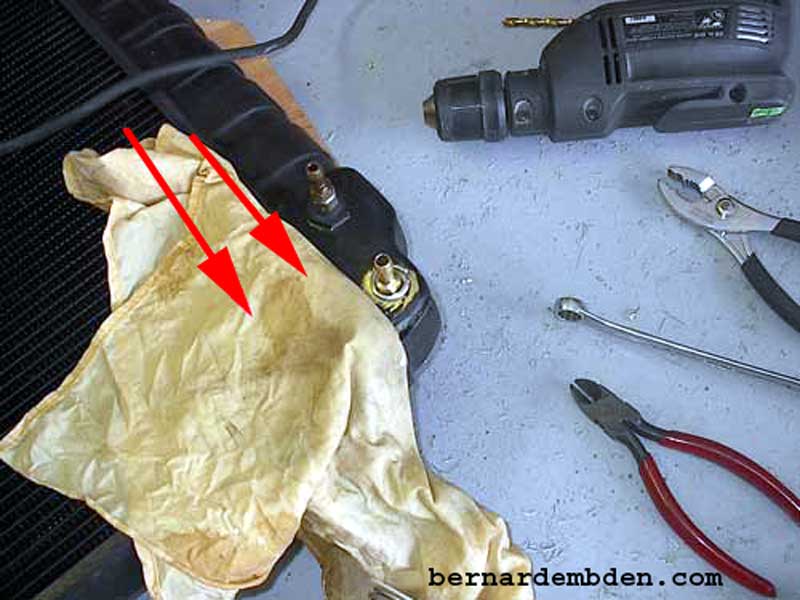
Note the position of the wet rag heat soak. It is to protect the area where the side talk is already soldered to the radiator's cooling tubes.
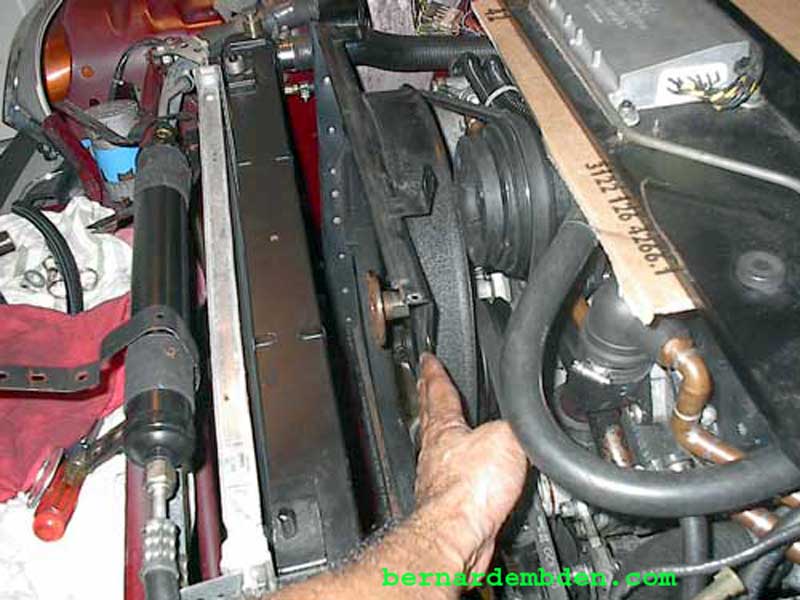
Modifications complete, Install radiator. Note transmission cooler fittings. (red arrows photograph below)
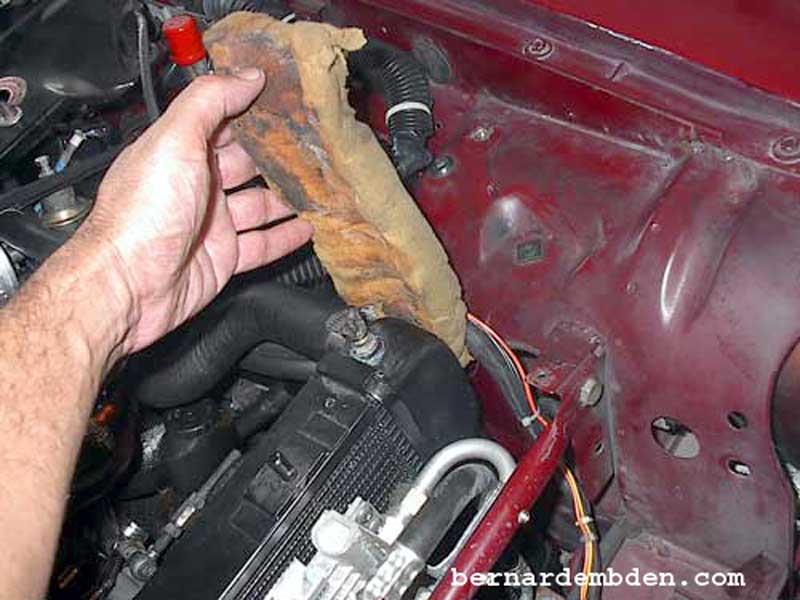
Be sure to install foam between the body and radiator.
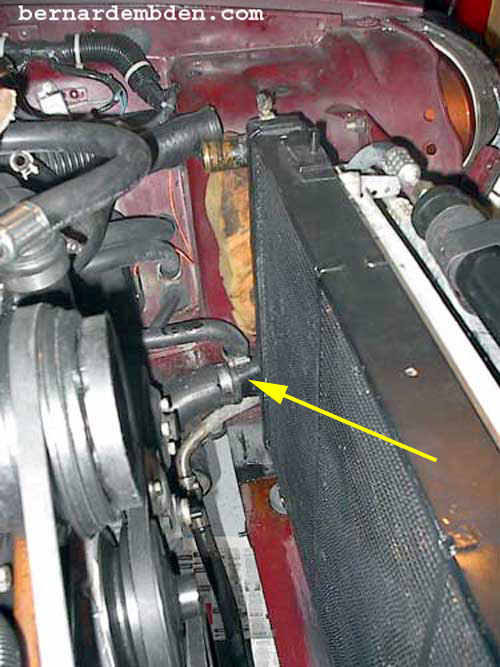
Connect lower radiator and expansion tank hoses. (yellow arrow photograph below) Do not connect upper radiator hose until radiator shroud with electric fan is installed.
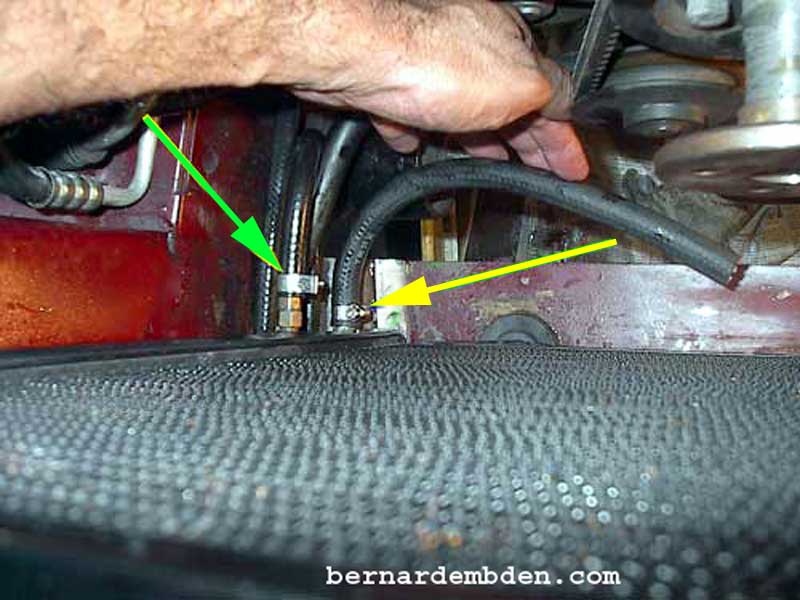
(Photograph below) Connect transmission cooler lines to modified fittings. (green arrows) Note new hose attached to customized drain connection. (yellow arrows)
![]()
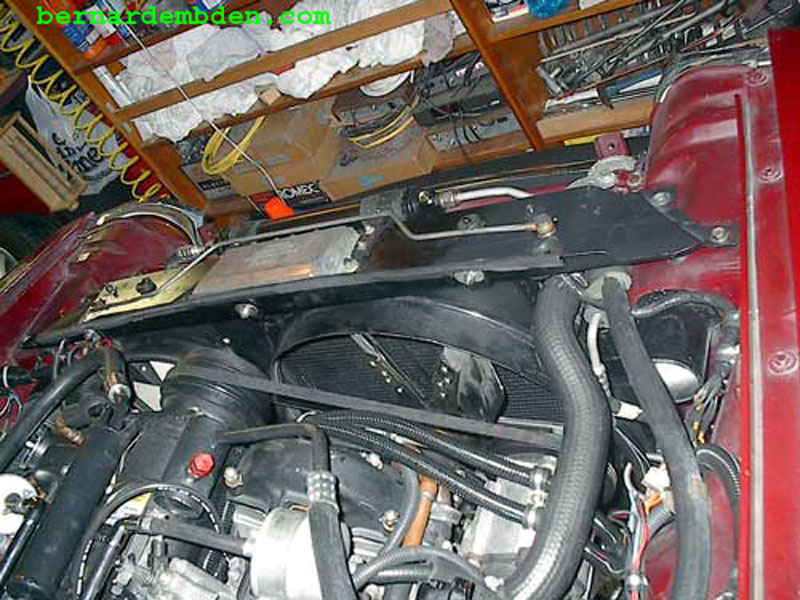
Install mechanical fan shroud.
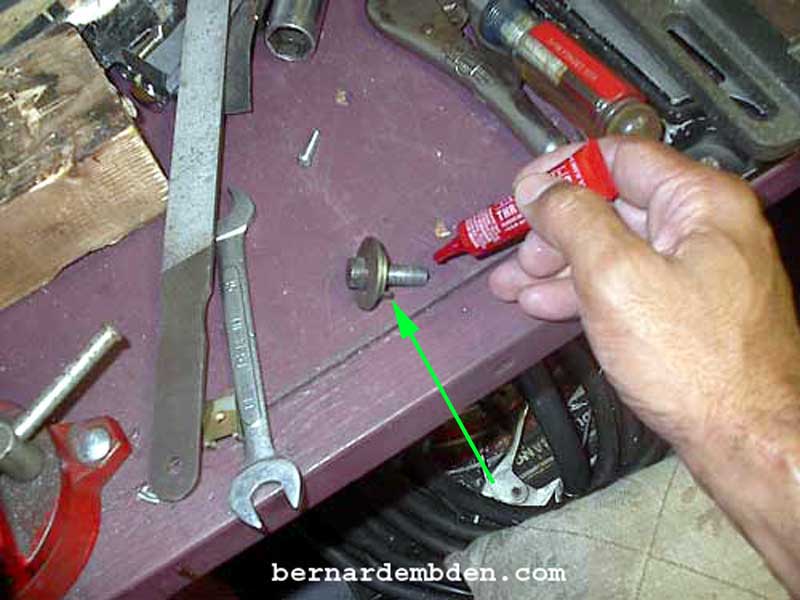
I recommend that Loctite is used on the threads of the bolt assembly (special washer and roll pin photograph below) necessary to bolt on the Pre-HE fan clutch. This special washer roll pin (green arrow photograph below) fits in a corresponding hole in the fan clutch-mounting jockey. It prevents the washer from turning and backing off the fan at speed. Do not modify or remove this roll pin.
Install fan. (note absence of a fan clutch covered in another link of my website).
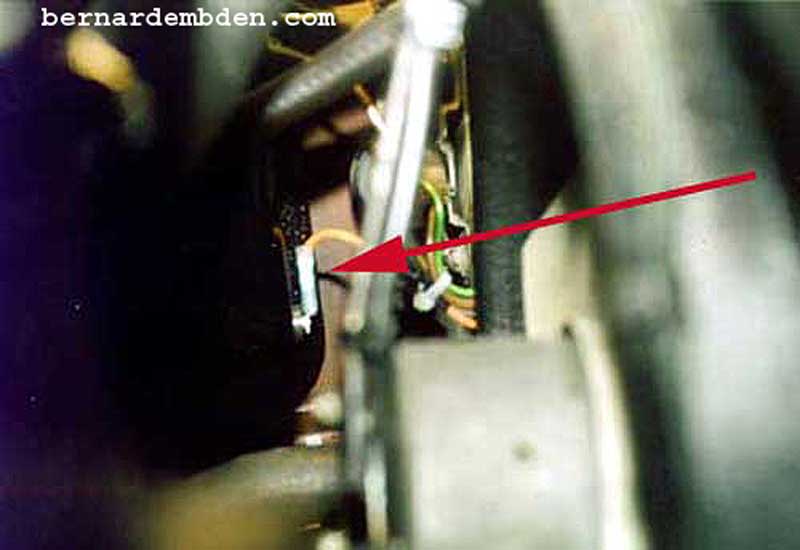
The low coolant switch was moved to the expansion tank. Lengthen wire and attach to low coolant switch in new position in the expansion tank. (red arrow photograph below)
After installing radiator top support, the right side tank bleed fitting does not line up with bleed tap. The new radiator side tank bleed fittings are lower and slightly off center. This is not an uncommon problem with non OEM equipment. The side tanks appear to be generic units modified for the Jaguar application. Expect to do some modifications as detailed below.
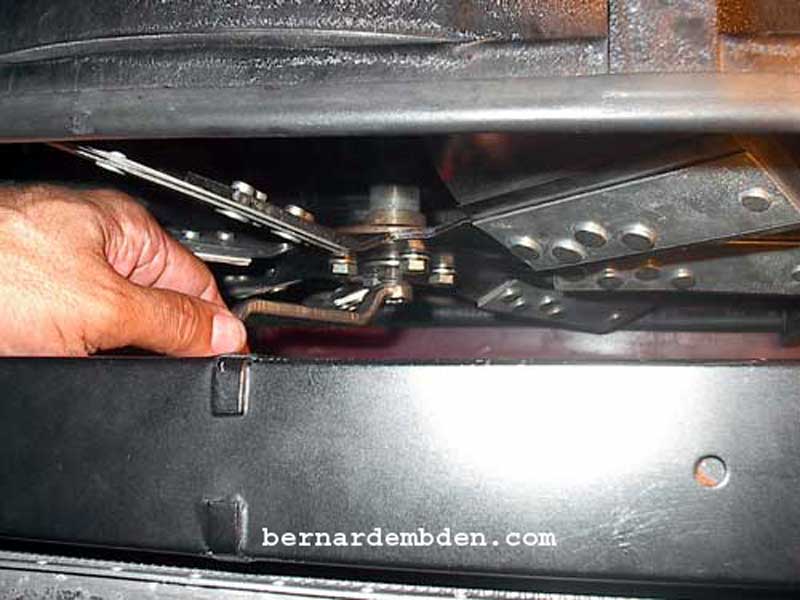
The hole in the upper radiator top assembly that the banjo fitting goes through for the right side bleed fitting has to be enlarged. A round file is the preferred tool here. (red arrow photograph below)
Using my custom spacer I installed the radiator banjo fitting. Do not forget the (3) special sealing copper washers.

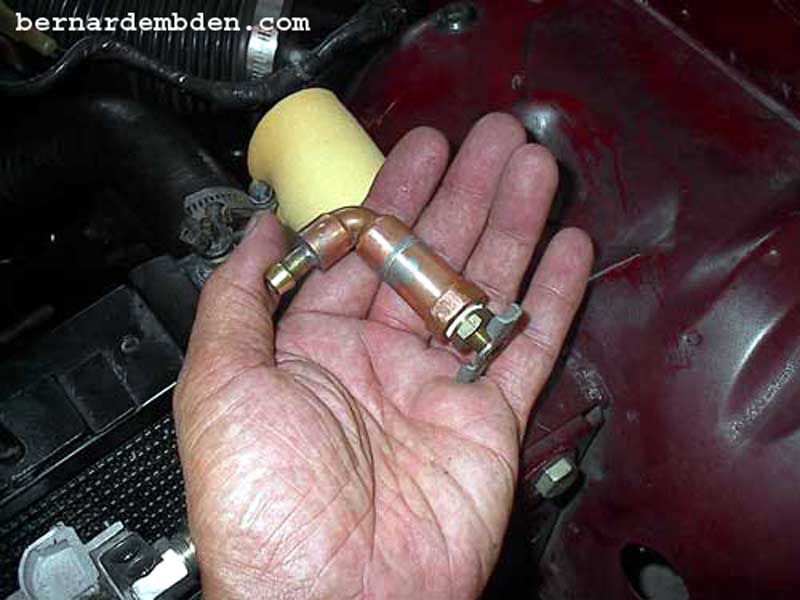
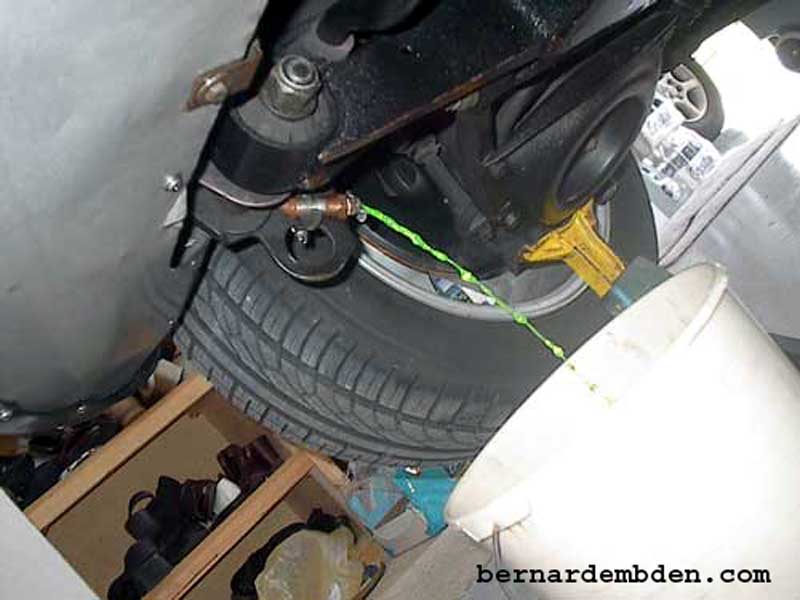
In the photographs below, I fabricated a drain plug by soldering several fittings together. This will attach to the radiator drain fitting via a hose.
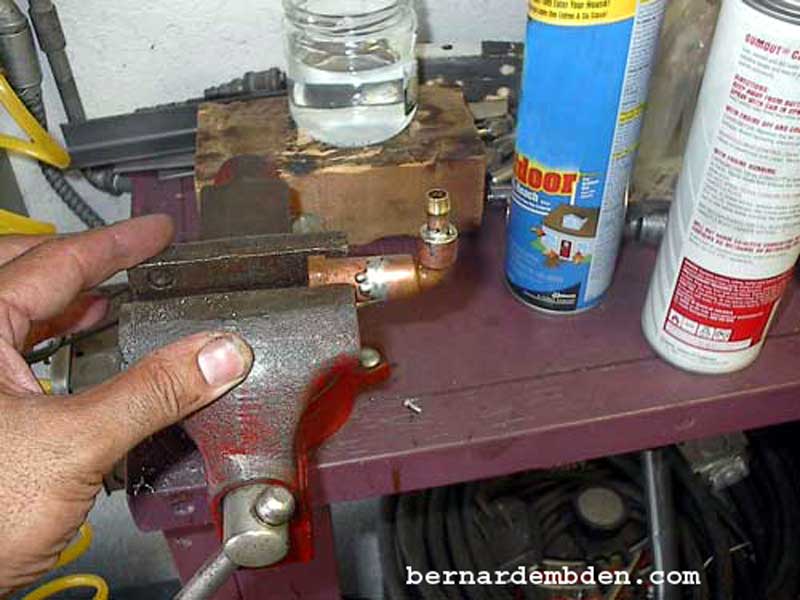
Install petcock in the female end of the modified fitting. Use Teflon tape (or equivalent) to ensure a leak free fitting.
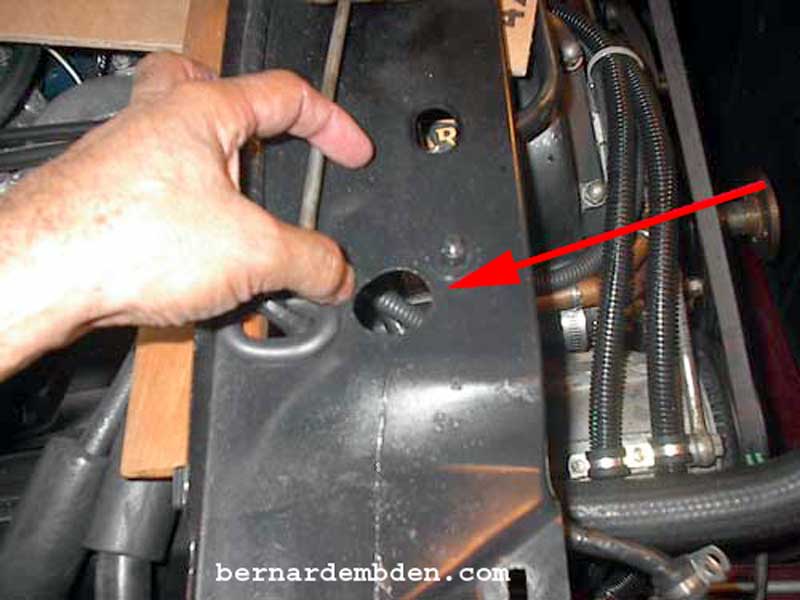
In the photograph below, the drain hose is attached, with clamps, to the custom drain plug adapter. I secured the adapter to the right tow attachment bracket. This not only secures the adapter, but also protects it from road damage.
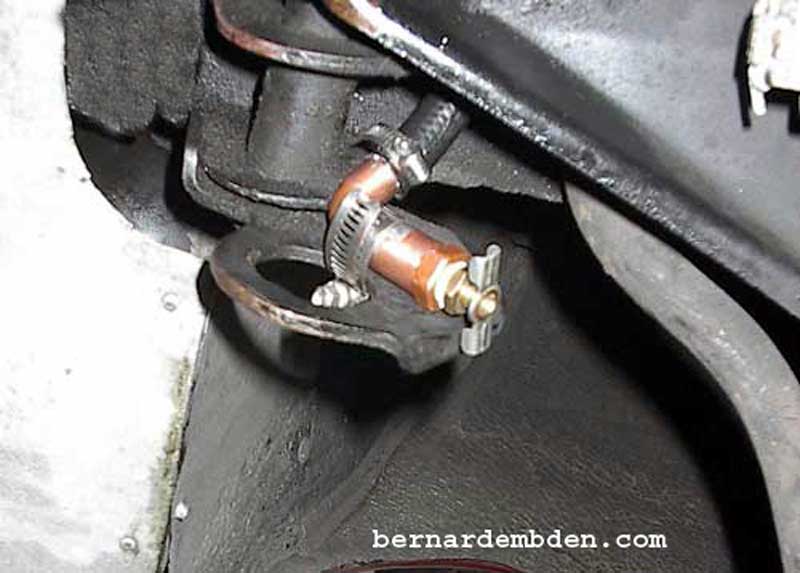
Draining the radiator is now a simple matter of opening the petcock.
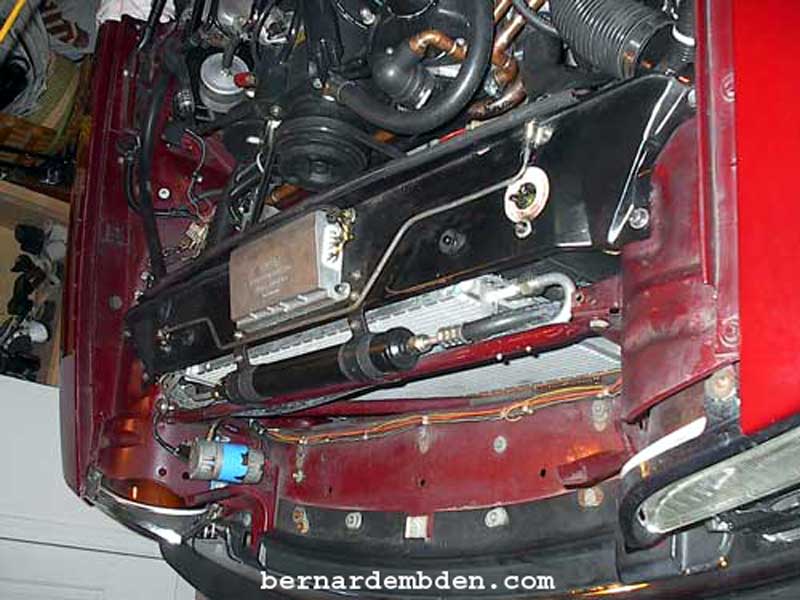
Install top radiator support and A/C drier brackets.
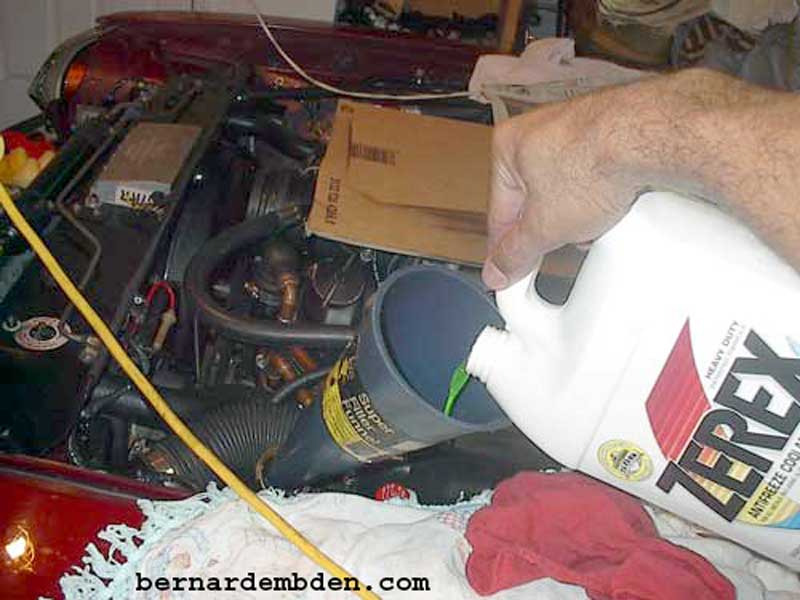
I use 3 gallons of antifreeze and fill with water. (preferably distilled water)
The fill procedure is as follows :
Open bleed tap
Add specified coolant at expansion tank until no more can be added.
Close bleed tap and expansion pressure cap.
Set A/C control to 80 degrees and "defrost".
Run engine at approximately 1000 RPM for 3 minutes.
Switch off engine.
Open bleed tap. When air has purged from system close bleed tap.
Remove pressure cap from expansion tank and add coolant until full. Refit pressure cap.
Note: It helps if the front of the car is higher than the back when filling and bleeding the radiator.
Start engine and check for leaks.
1990 Radiator installed into 1978 Jaguar XJ-S completed. The modified drain system will one day save your life.
