
Leaking from the power steering rack tower seal required removal and replacement of the steering rack. Greg Wells of Coventry West (independent Jaguar reseller) suggested that I install the rack from the post HE Jaguars. He maintains that the later steering rack is superior due to better internal design. A post HE rebuilt rack was acquired along with new tie rod ends from Coventry West.
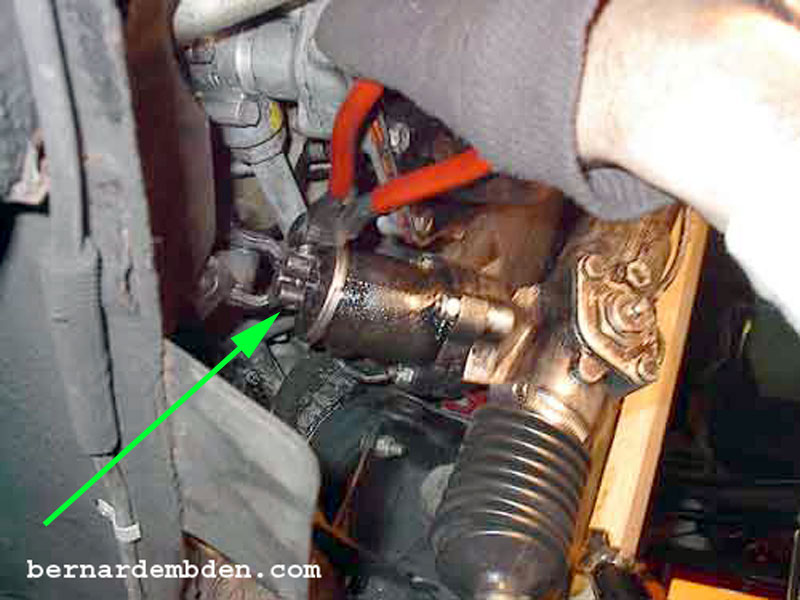
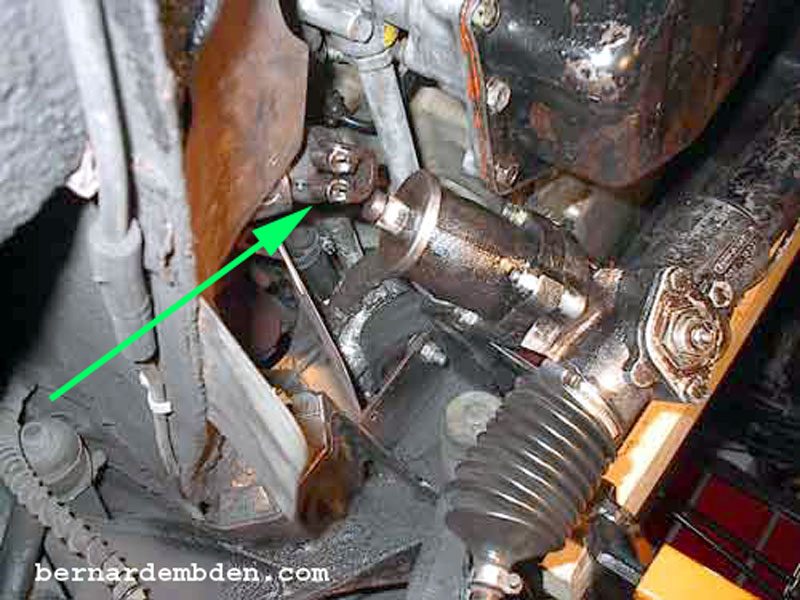
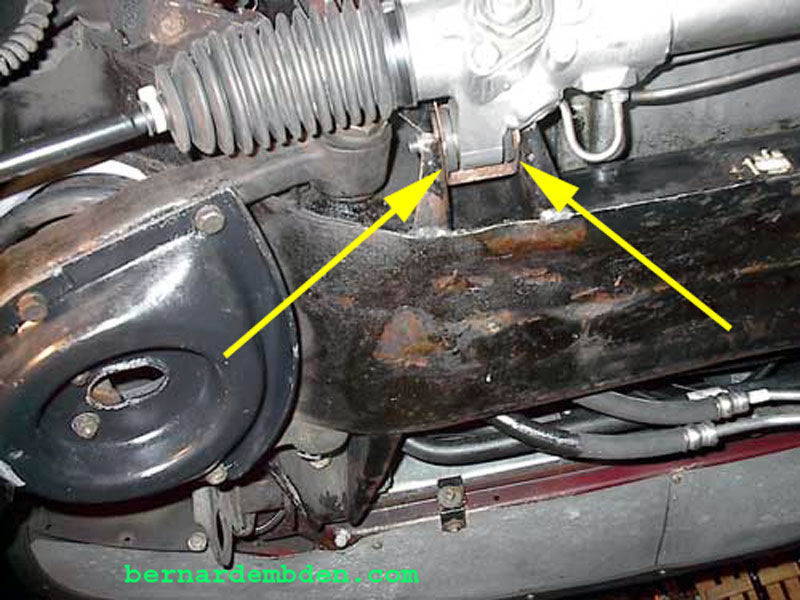
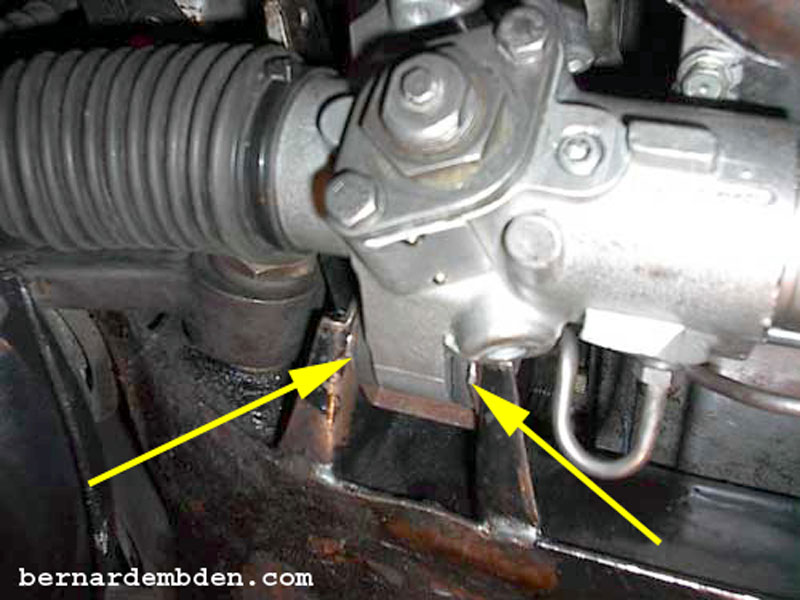
First remove the old rack. This is a real PIA. The main problem is releasing the rack tower from the lower steering column. The pinch collar bolt MUST be completely removed before the rack can be pried away from the steering column. (green arrows photographs below).
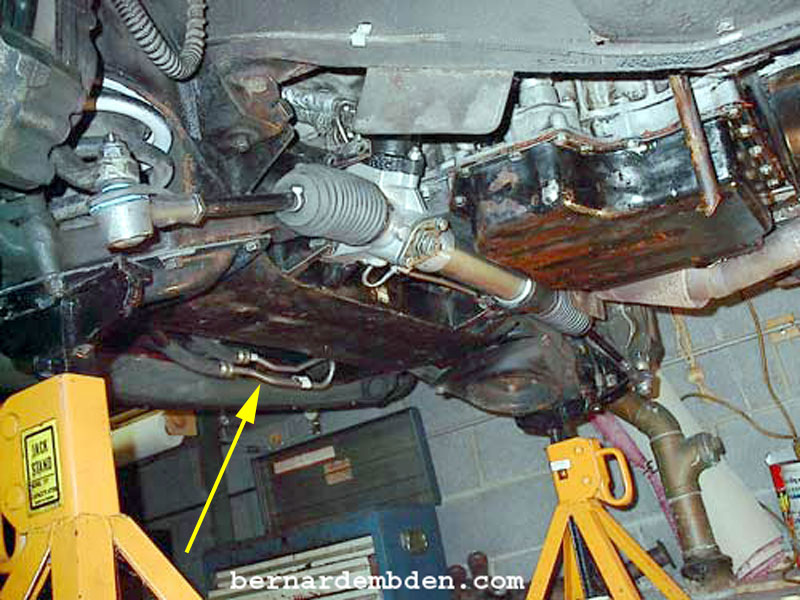
Once the pinch collar is disengaged from the rack the power steering oil feed and return pipes can be removed.
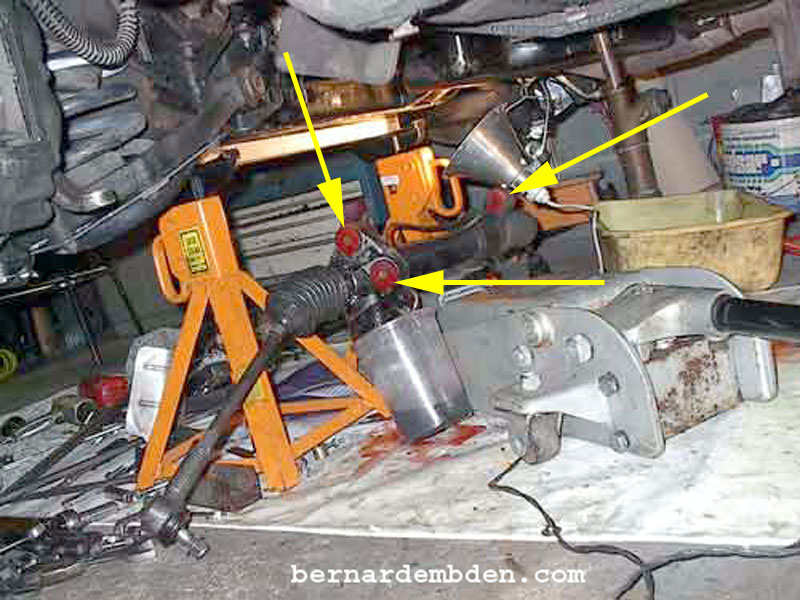
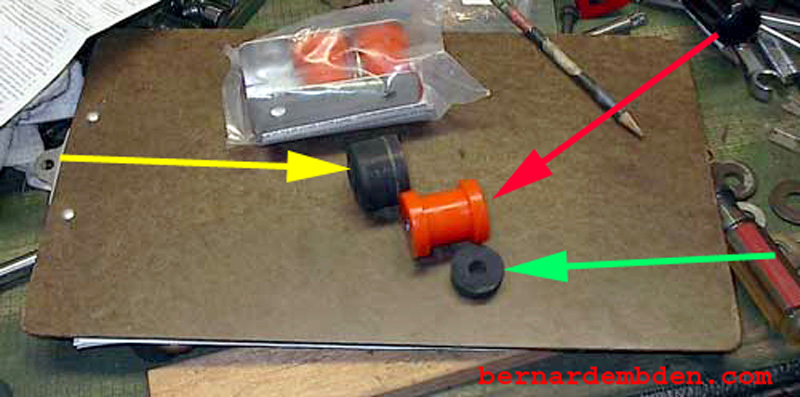
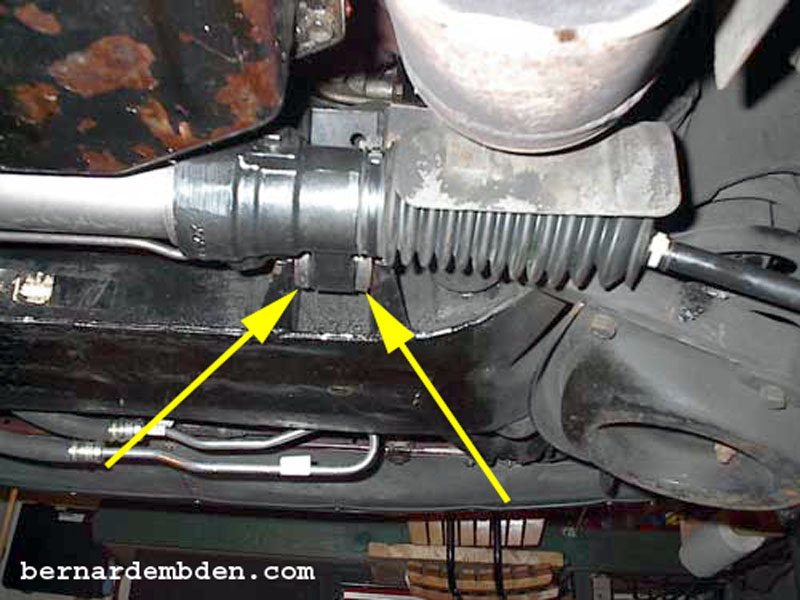
Remove three bolts that hold the rack bushings and lower rack. A floor jack helps. Note polyurethane bushings in old rack. (yellow arrows photograph below).
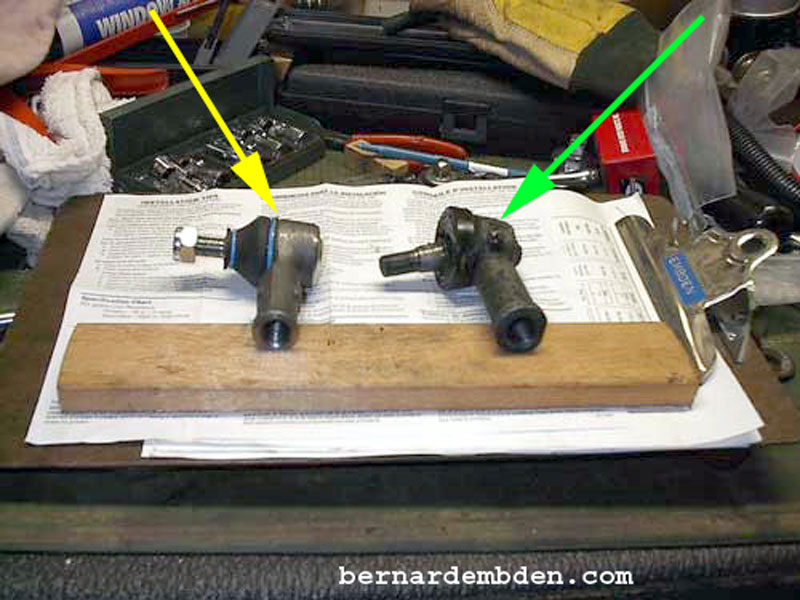
In the photograph below the yellow arrow identifies the Post HE tie rod ends. The green arrow identifies the existing Pre HE tie rod ends.
The stock rack bushings are notorious for it sloppiness. Under hard cornering these bushings tend to allow rack movement. Installing polyurethane bushings has been the primary method for curing this problem. To address this issue polyurethane bushings had been installed in an earlier project.
In examining the old polyurethane bushings it appeared that the leaking oil from the current rack reinforced the impression that oil is its kryptonite.
I am not suggesting that oil degrades polyurethane bushings, on the contrary polyurethane bushings are virtually impervious to oil and grease. IMHO the issue is that a small amount of oil seems to more readily stay on the surface of these bushings and give the appearance of oil soaked bushings.
I had purchased polyurethane bushings fully intending to replace the bushings prior to installing the new (rebuilt) steering rack. I decided not to install these bushings. Why? Instead I decided to use the new original stock Jaguar rack bushings that came pre-installed in the rebuilt rack. (stay with me on this).
After closely examining the stock and polyurethane bushings I decided that the stock bushings could be modified to function essentially as well as the replacement polyurethane bushings and would not deteriorate when exposed to oil.
The problem is that the stock bushings are not always under compression. If they were, then rack movement would be virtually eliminated. My solution was to install side bushings to maintain bushing compression under lateral movement of the steering rack.
Note: This modification should only be installed if the original rack bushings are undamaged. I do not recommend this modification as a means of "fixing" damaged or worn steering rack bushings.
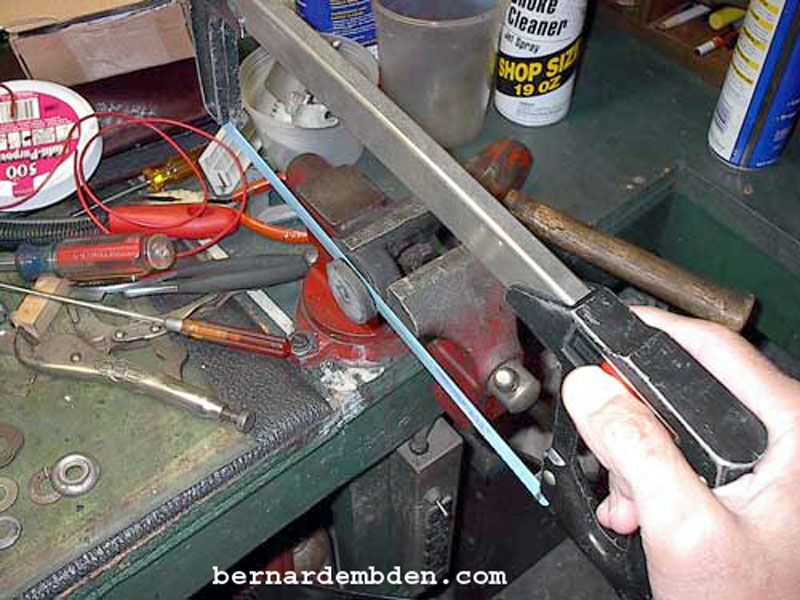
First I acquired shock absorber bushings (available from any auto parts store) and, using the end of new polyurethane bushings as a guide, cut off approx. 1/4" from the new bushing. (See photographs below)
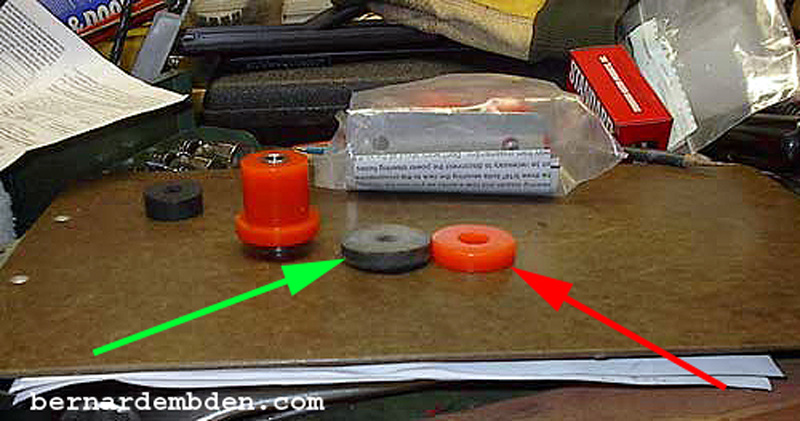
Yellow arrow. Shock absorber bushing with mark to be cut off.Red arrow. New polyurethane bushing.
Green arrow. Excess part of shock bushing. (discard).
Secure shock absorber bushing in a vice and cut at mark. (yellow arrow in above photograph).
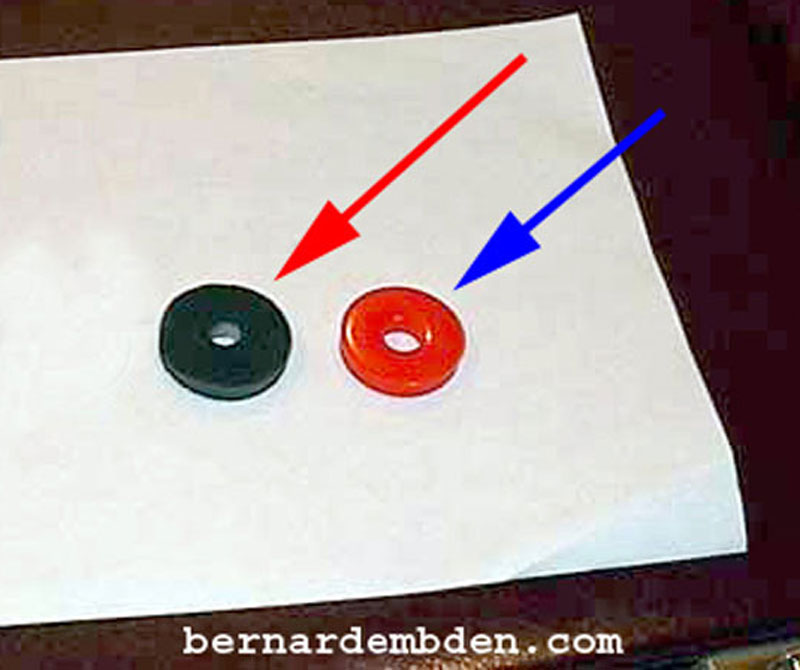
In the photograph below, cut bushing end (green arrow) should compare to thickness of polyurethane bushing end (red arrow).
You will need to fabricate a total of 6 bushings. (red arrow photograph below). If necessary punch out the hole size to fit over metal sleeve of the original Jaguar rack bushings.
Before installing the rack you must connect the high and low pressure hoses to the rack tower. This a real PIA. (I suggest new hoses if the old hoses are more than 5 years old.).
First, attach the tie rod ends. (this supports the rack.) Remove clamps that hold the high pressure hose to the front of the engine cradle. Remove low pressure hose from oil cooler. (This gives you enough slack to connect the hoses to the rack tower.) Offer rack tower to hoses and connect high and low pressure hoses. Assembly custom side bushings over the existing rack bushings metal sleeves and offer rack up to its mounting locations. If necessary use a floor jack to force the bushing assembly into its mounting locations. Below are photographs of the modified rack bushings (tower/drivers side) installed. (yellow arrows).
Photograph of the modified rack bushings installed on the passenger side.
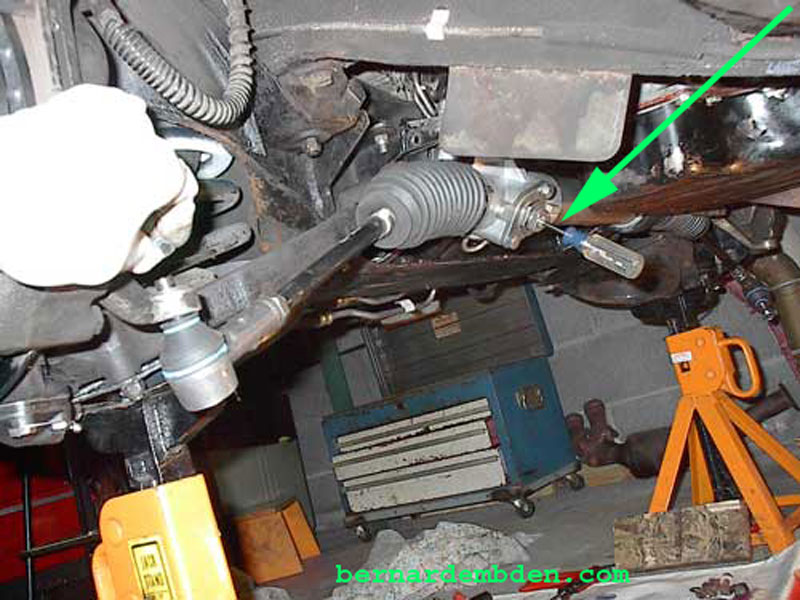
Remove plug or grease fitting from the rack, and using a small screwdriver, locate the rack center. Align steering wheel to center. Align road wheels straight and fit tie rod ends. Screw tie rods in or out as necessary to maintain the wheels in the straight ahead position. You are not trying to align the wheels, just making it possible to drive to the alignment shop without destroying the front tires. (green arrow photograph below).
Rack installation completed. New power steering high pressure hose, (yellow arrow photograph below) is secured after the rack is installed.
Initial road testing indicates that this rack compares extremely well with my previous (polyurethane bushings installed) rack. Be forewarned, road "feel" is significantly improved. There is some steering feedback as the wheels encounter road irregularities. If the isolation of the original Jaguar steering is what you wish, do not do this modification. In my opinion, this is a significant improvement over the stock bushings.
