My 1978 JX-S developed a small leak from the valve cover gasket. There is a significant amount of time and labor required to replace these gaskets. Because the half-moon seals would also have to be replaced, this was an opportunity to install Ron Kelnhofer's aluminum seals.
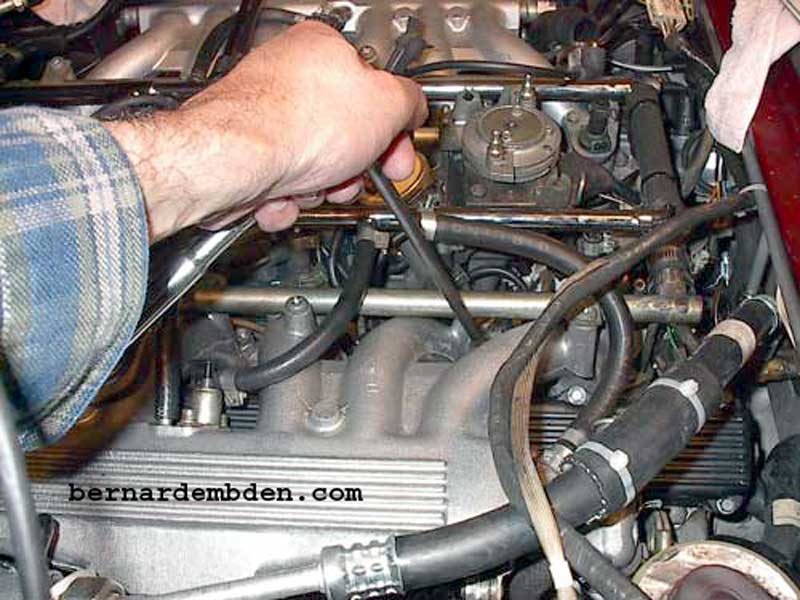
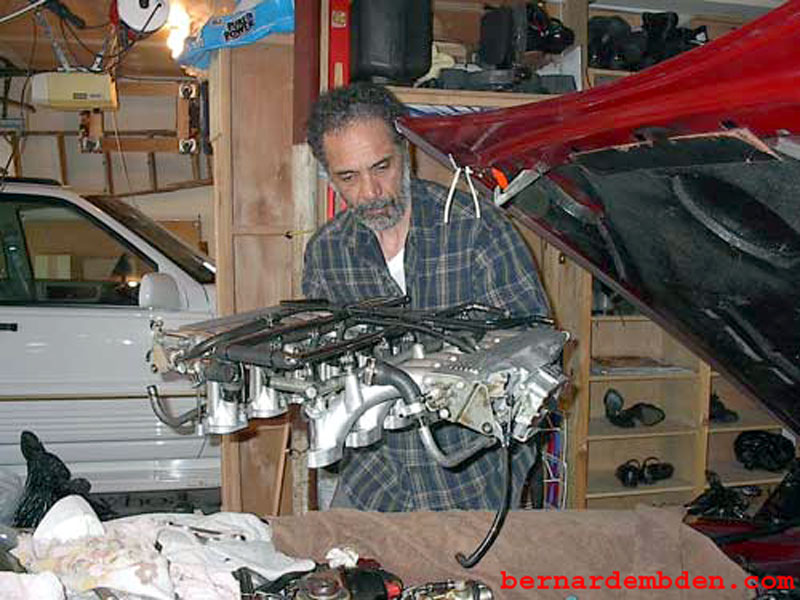
Tag fuel injector connections. The intake manifolds are removed as a single unit. The manifolds are heavier than you might think and somewhat unwieldy, (a two man job) however this process saves time and money. Fuel injector seals for one; do not have to be replaced. (This tip is in Kirby Palm's book and is credited to Victor Naumann.) In my opinion, this procedure only makes sense for the post-HE cars. The pre-HE's have dual fuel rails; therefore the fuel rail does not tie the intake manifolds together. This would make it somewhat difficult to remove both manifolds as a single unit. Even though my car (1978) is a pre-HE model, I removed the manifolds as a unit because of my custom single fuel rail.
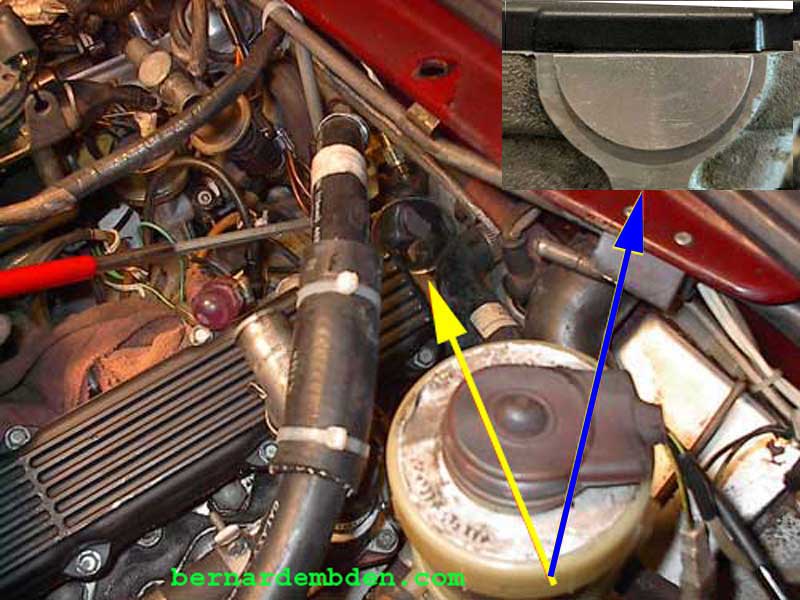
Note removal of EGR elbows and valve. Blank plates (blue arrows photograph below) are fabricated from aluminum stock.

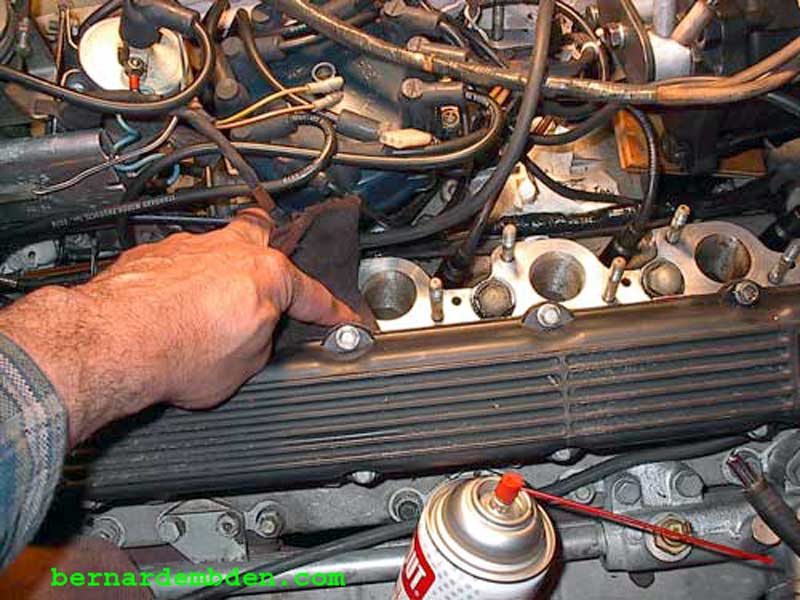
Once the valve covers are off, take the necessary time to clean the tappet block surface thoroughly.

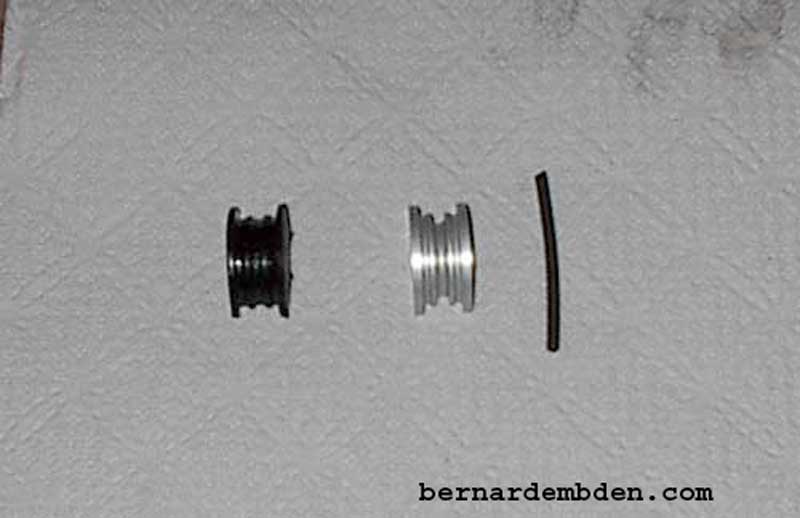
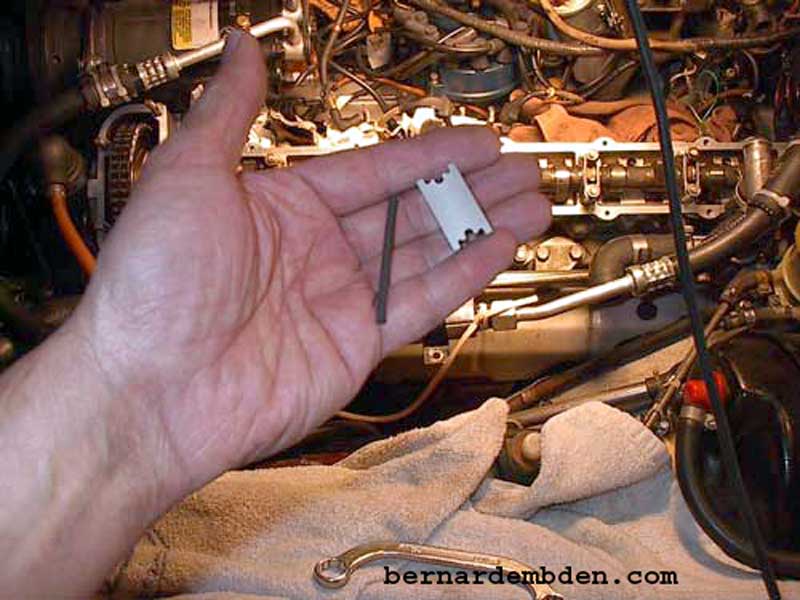
Below are photographs of Ron Kelnhofer's seals. These seals are made from clear coated 6061 aluminum and feature a length of Viton "O" ring material to ensure bottom sealing.
This replaces the original rubber seal
In the photograph below the original rubber seal is on the left, aluminum seal in the center and the half Viton material on the right.
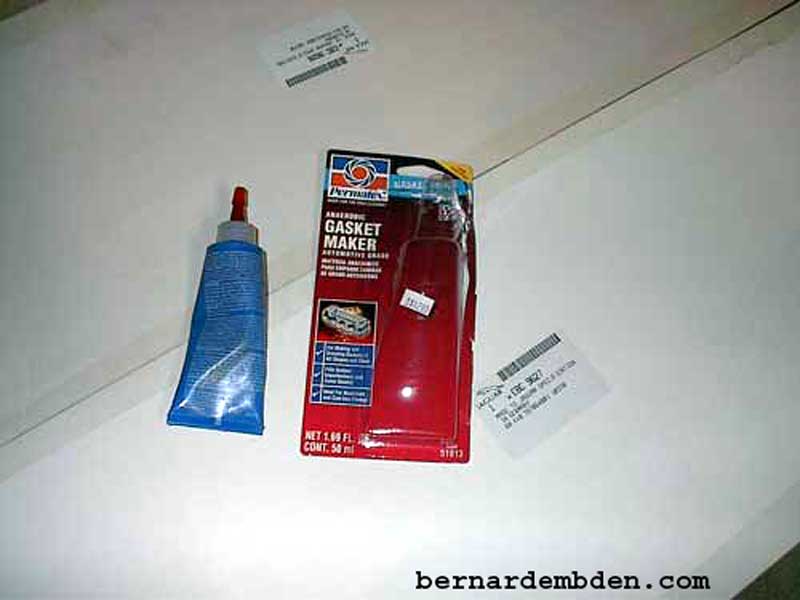
There are a number of gasket makers/cements that can be used in this project. In my discussions with a local parts house, they recommended a gasket maker that is used locally by the state trucking department.
The product (pictured below), is red in color and named "Permatex anaerobic gasket maker". The label contains the following warning. Avoid eye and skin contact. When used in an OSHA regulated workplace, consult the MSDS. This product contains a chemical known to the state of California to cause cancer and birth defects.
This was powerful stuff, just what I wanted. You don't want to put this thing together and have it leak. Note that because of the half-moon seals, I recommend a gasket maker, not a gasket dressing.
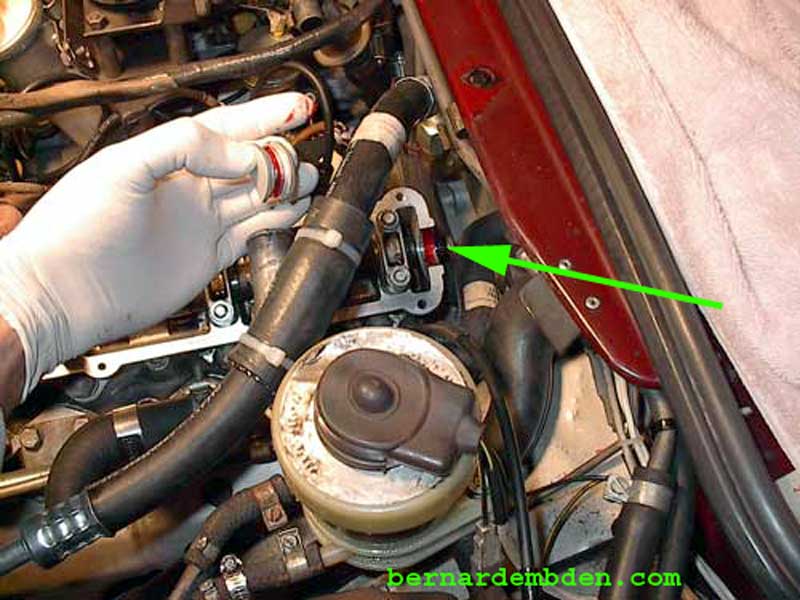
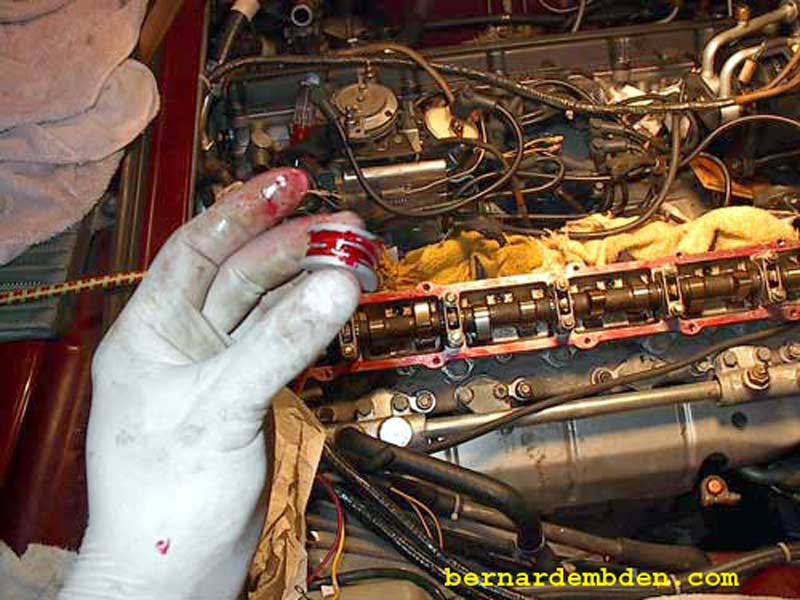
Got my gloves on. You don't have to tell me twice about avoiding skin contact. Apply the sealant to the tappet block and aluminum half-moon seal. Run a continuous bead. Don't skimp on this process, apply liberally. Also applied sealant to the area in the tappet block where the half-moon seal contacts. (green arrow photograph below)
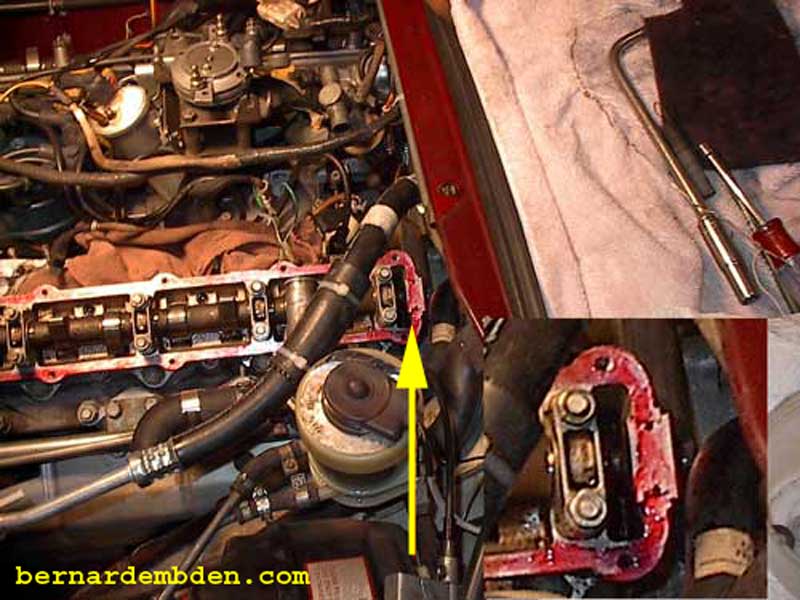
Press the cut off "O" ring material supplied with the seal into the aluminum half-moon grove. Coat the "O" ring and half-moon seal liberally with gasket cement. Insert into tappet block. (yellow arrow photograph below). The half-moon seal will protrude slightly above the surface of the tappet block because the "O" ring material needs to be compressed. Cut off the excess "O" ring material flush with the half-moon seal. Note: Do not cut the "O" ring material flush with the tappet block. If you do the "O" ring material will be too short and could comprise sealing. The magnified quadrant (lower right) in the photograph shows the half-moon seal installed in greater detail.
The process is repeated on the other tappet block. I coat the tappet block first with sealant. Then the gasket is placed on the tappet block and half-moon seals. I then coat the gasket with sealant. This sequence means that no sealant is necessary on the valve cover itself. My reasoning is as follows :
Because no sealant is applied to the valve cover mating surface, no sealant can be removed from the valve cover mating surface if the surface inadvertently comes in contact with any part of the engine during installation.
Install valve covers and tighten. I start at the middle of the valve cover and tighten outward. This probably makes no difference, but habits are hard to break. I recommend retightening all valve cover bolts again before installing intake manifolds. Below is a photograph (looking through a mechanics mirror) showing the half-moon seals installed. (yellow arrow photograph below).
The magnified quadrant (blue arrow upper right photograph below) show the installed seal in greater detail viewed from the rear of the engine. (source: John from Lithuania, a contributor to the XJ-S Jaguar forum who now manufactures the updated version of the half-moon seals).
Note. In the updated version of the aluminum seal, the grove for the Viton "O" ring material has been removed. This improved seal now requires gasket making sealant below the aluminum seal instead of the Viton material. This makes for a simpler more reliable install.
Clean intake ports thoroughly. It's a good idea to plug the ports with shop rags. I don't recommend sandpaper, grit tends to get into the engine. I use a "scotch pad" for the final cleaning.
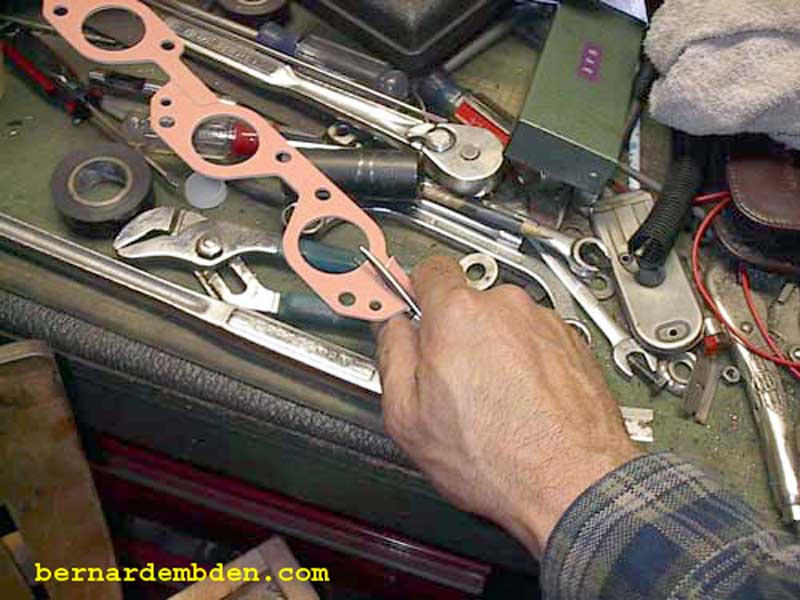
Jaguar currently makes an upgraded intake manifold gasket. It's the same part for all V-12 engines. On the pre-HE cars, due to plug location, the gasket has to be trimmed. Using the intake manifold as a template, mark the location of the excess gasket material.

Using a pair of shears, or a sharp razor, cut each runner gasket as marked.
I use a non-hardening sealant on the intake manifold. First, coat the intake ports.

Trim and install all gaskets. The two middle ports do not need to be trimmed. Apply gasket sealant to the installed gaskets. Gasket sealant is not applied to the sealing surface of the intake manifolds for the same reason I do not apply sealant to the sealing surface of the valve covers. (no sealant can be removed from the intake manifolds mating surface if the surface inadvertently comes in contact with any part of the engine during installation.)

Tighten intake manifold bolts. Project complete. Attach bell crank rods, fuel injector connections (you did tag them didn't you?) and vacuum lines etc. .