
The oil leaks underneath my 1978 Jaguar XJ-S was no longer a couple of occasional drops, it was more like a steady stream. The oil leaks now had reached the "marking your territory" phase. I could no longer park in driveways. This was unacceptable.
Some time ago I had addressed oil leaks from the top and front of the engine. See replacing the half-moon seals, tensioner plug, banjo washers and front crankshaft seal links of this website.
This project would detail replacing the gaskets at the bottom of the engine.
The design of the Jaguar V-12 engine is a study in contrasts. Stating that the fundamental 1971 design is brilliant might not be an overstatement. Also stating that some of the design is needlessly complex is, in my humble opinion, undeniably.
This engine is designed to leak oil. The oil filter housing is attached to the side of the engine with an external connection to the oil cooler. The oil cooler return line connects externally to the sandwich plate. Oil is pumped to the tappet blocks via external, banjo bolt style oil tube systems. The sandwich plate introduces another gasket. The rear main crankshaft bearing seal assembly sides are sealed, via sealing strips, to the block. The engine's myriad number of gaskets, sealing washers and "O" rings inevitably results in oil leaking somewhere sometime as the car ages.
With determination (and reasonably good health), time and attention to detail, most of these gaskets can be replaced without removing the engine.
For this project the front suspension cradle must be lowered or removed. (See Removing Front Suspension Cradle link on this website).
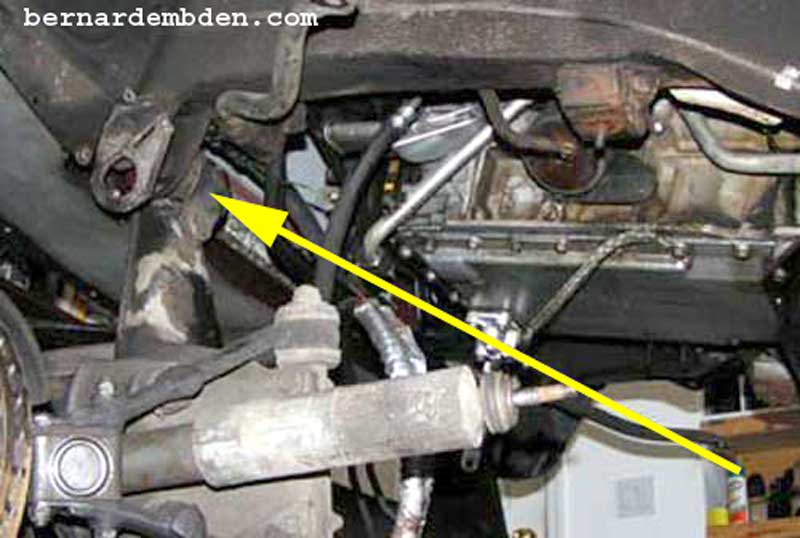
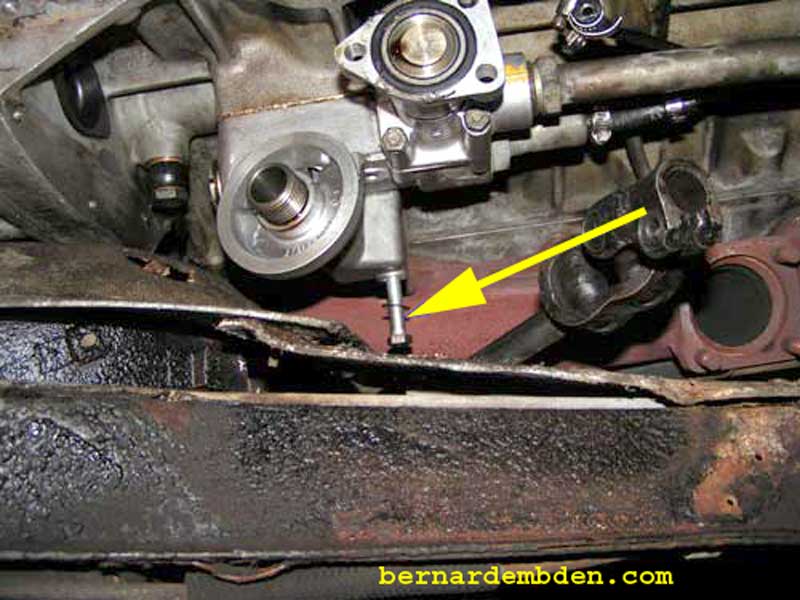
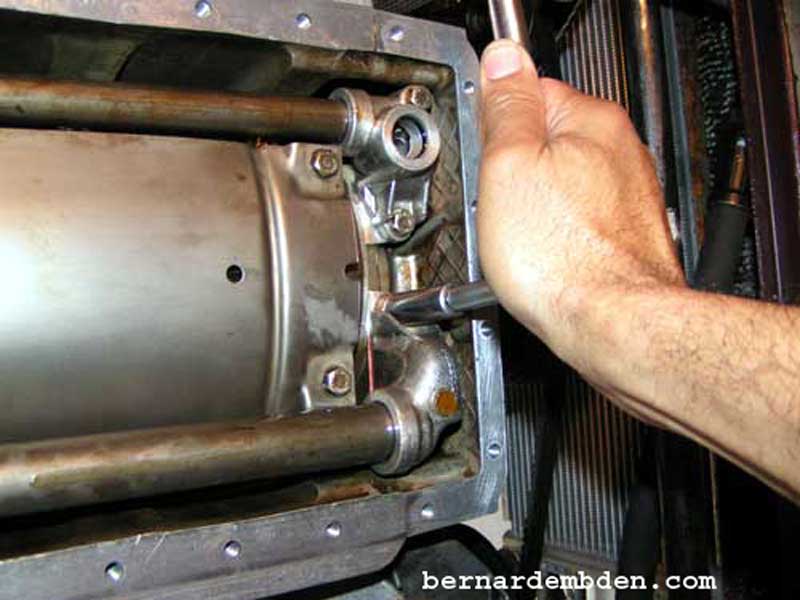
Unless the suspension cradle has to be completely removed, loosen the front eye bushings bolts (photograph below) and lower the rear of the assembly so it rotates on, and is suspended by, the loosened front eye bushing bolts. (yellow arrow second photograph below)
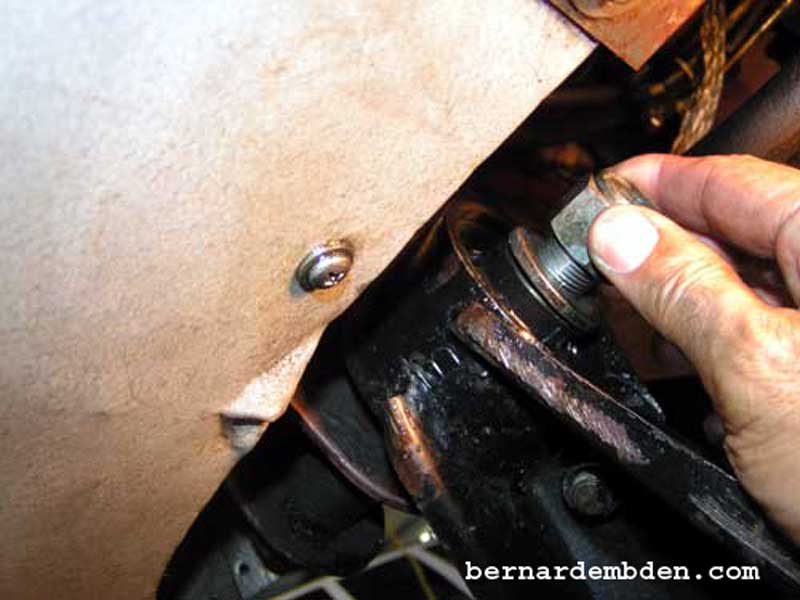
Drain the engine oil. Remove oil filter and oil pan. Note that the bolts that will be removed for this project is different. Identify and catalogue them as they are removed. (photographs below).
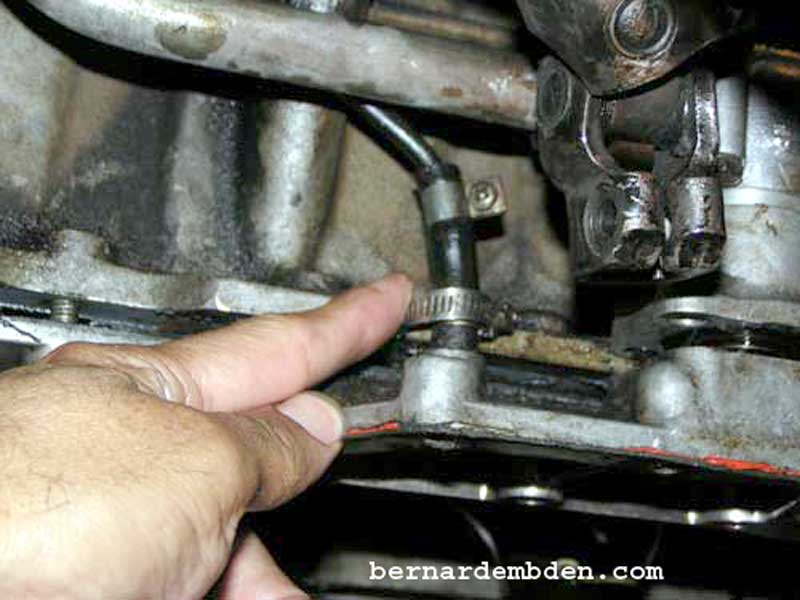
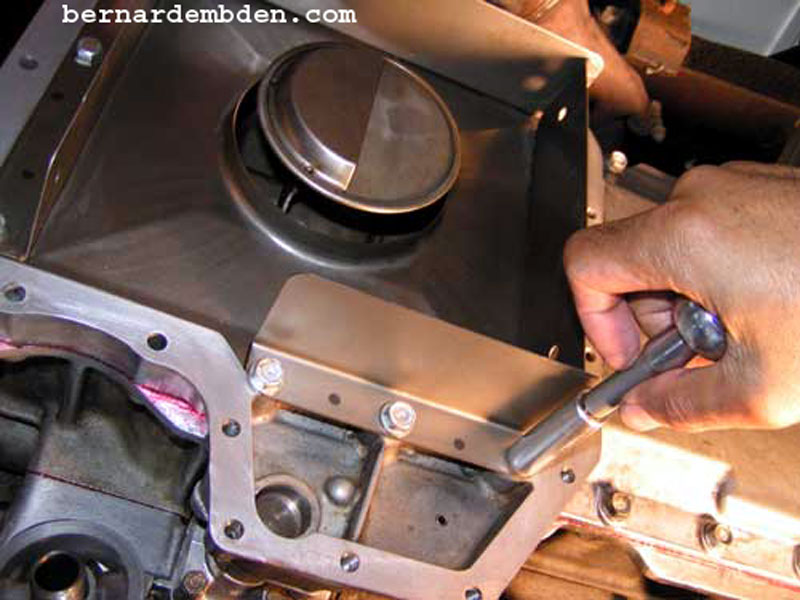
Remove the oil pressure relief valve vent hose that connect the external oil filter housing to the sandwich plate. Remove oil pan baffle, sandwich plate and windage tray.
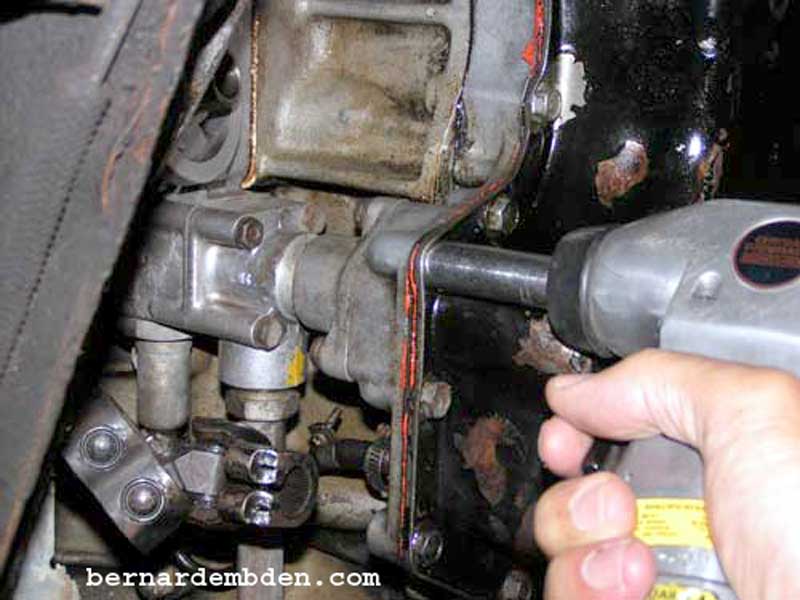
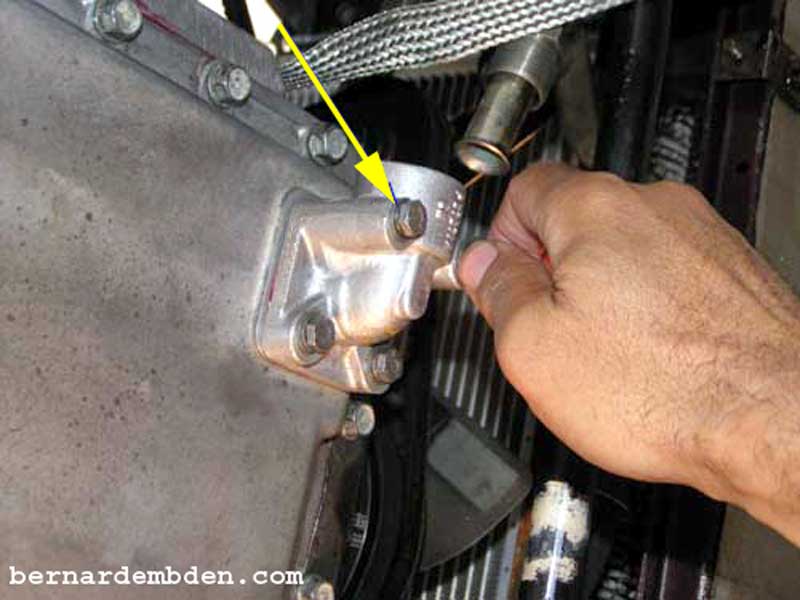
Remove external oil filter housing. Note: Two bolts, due to their length, must be removed with the housing (yellow arrow photograph below).
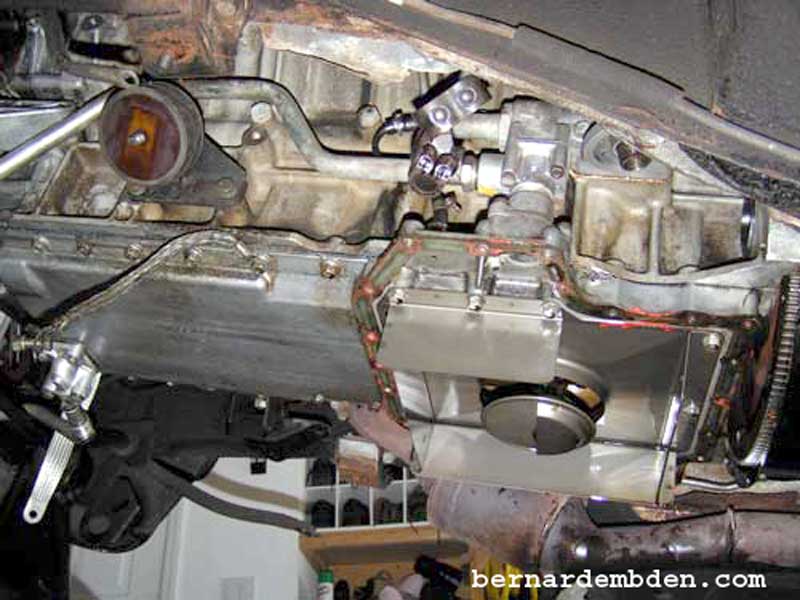
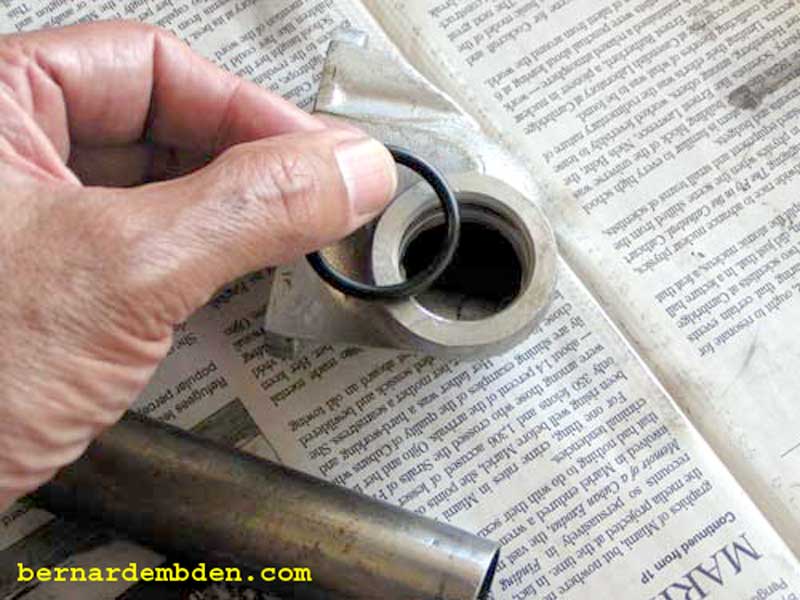
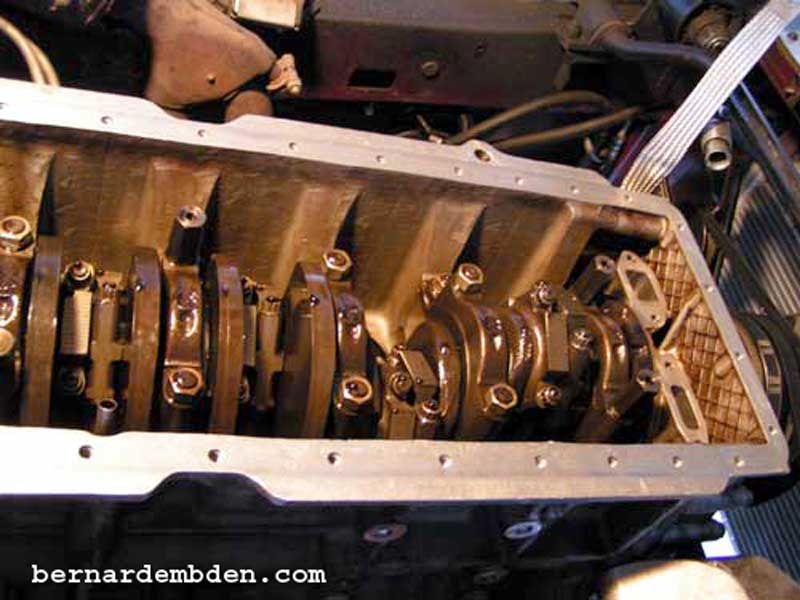
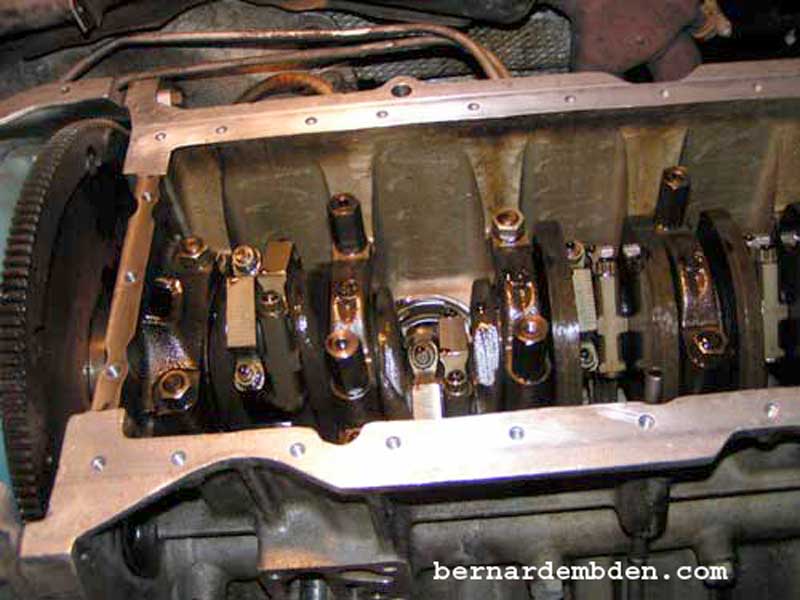
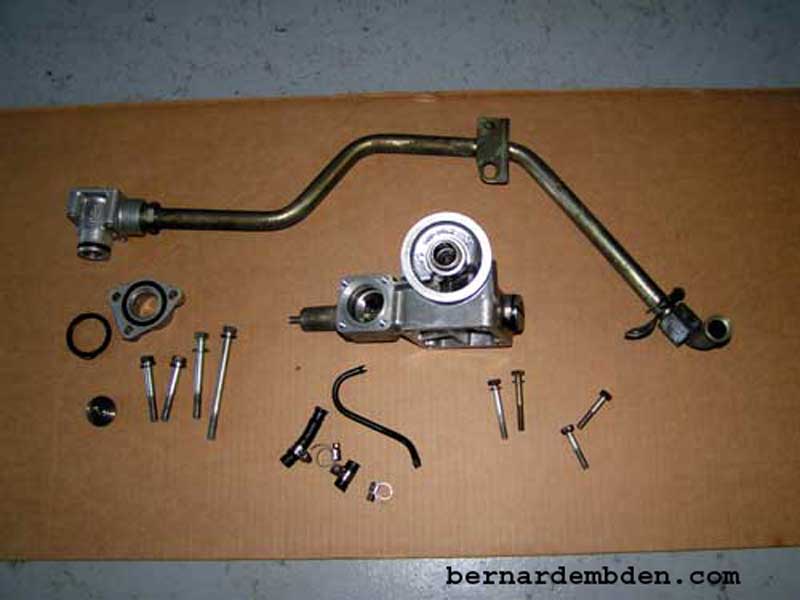
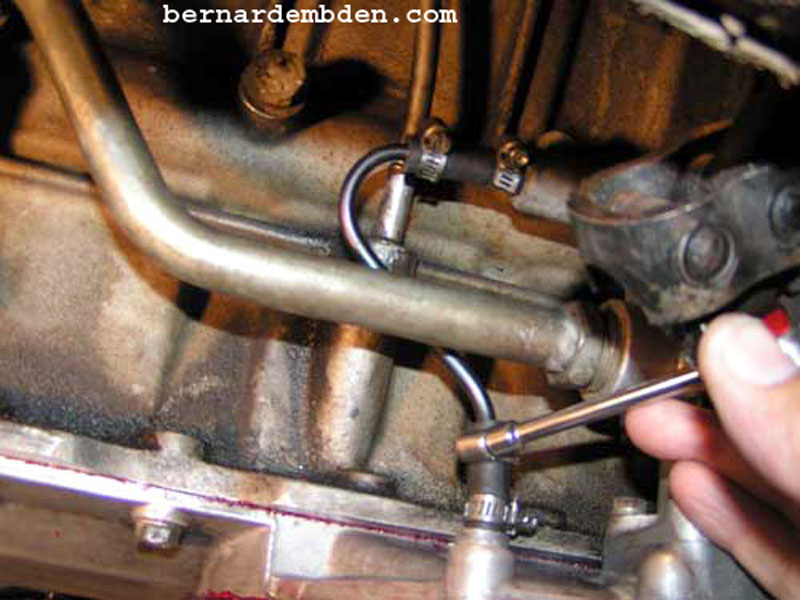
The bottom of the engine is now completely visible. Bolted to the bottom of the oil pump, at the front of the engine, are two fittings. The suction side is a "T" fitting that has one side connecting to the oil pan's pickup tube. The other side of the "T" fitting connects to the oil cooler return line via another fitting bolted underneath the sandwich plate. The other oil pump fitting (pressure side) connects to the external oil filter housing via a steel tube.
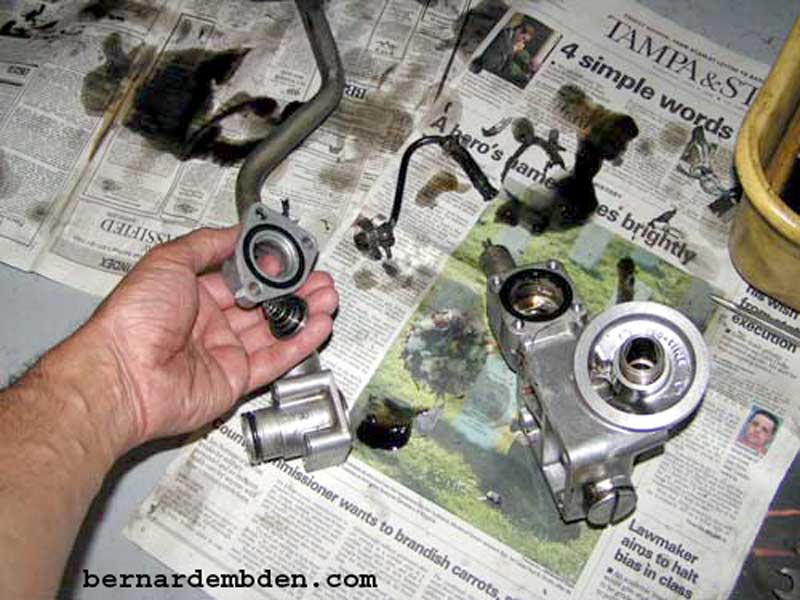
Sealing these various surfaces requires "O" rings for the tubes and gaskets for the oil pump fittings. Remove oil pan pickup, feed tubes and oil pump fittings. Clean and replace all "O" rings and gaskets.
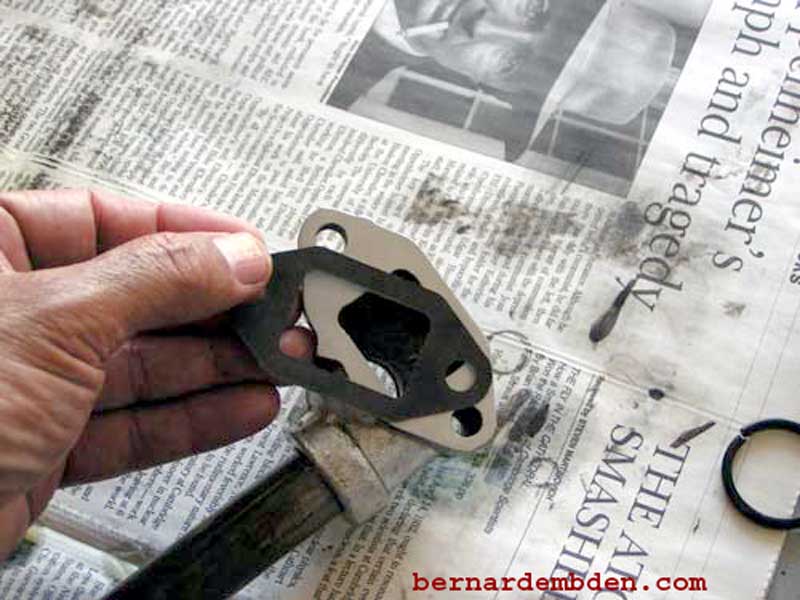
Clean the sandwich plate and engine block gasket surfaces. Do not rush this. If it's not clean it will leak. Dress any minor nicks with a flat file. Use a solvent to remove any residual oil. Once clean, do not touch any sealing surface with your fingers.
Before installing oil pump fittings, lightly coat all "o" rings with engine oil.
Disassemble the oil filter housing. Clean and replace all "O" rings and gaskets.
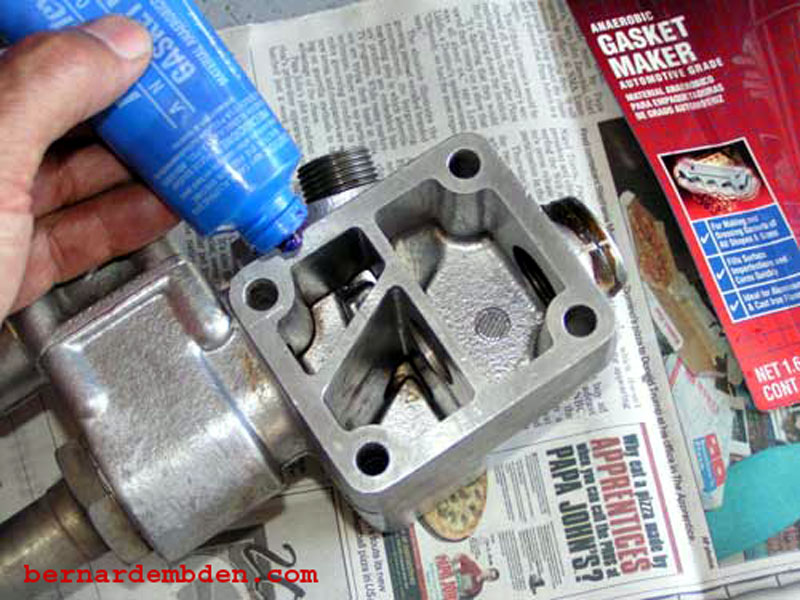
I use an anaerobic gasket maker from Permatex. (other manufactures offer this product as well). It's expensive, does not need air to cure, handles minor surface imperfections, resist temperatures to 300 degrees, disassembles easily, and it seals. (did I mention it was expensive?)
This is the same product that I used for my half-moon seal project and it has not leaked. Coat the external oil filter housing and block mating surfaces lightly with this sealant. Remember to attach the oil filter housing with the two long bolts in the housing before bolting the assembly to the engine block.
Repeat process for the sandwich plate gasket.
Pay special attention to the rear crankshaft seal assembly. Coat the joining surfaces liberally with the anaerobic sealer. (yellow arrows photograph below).
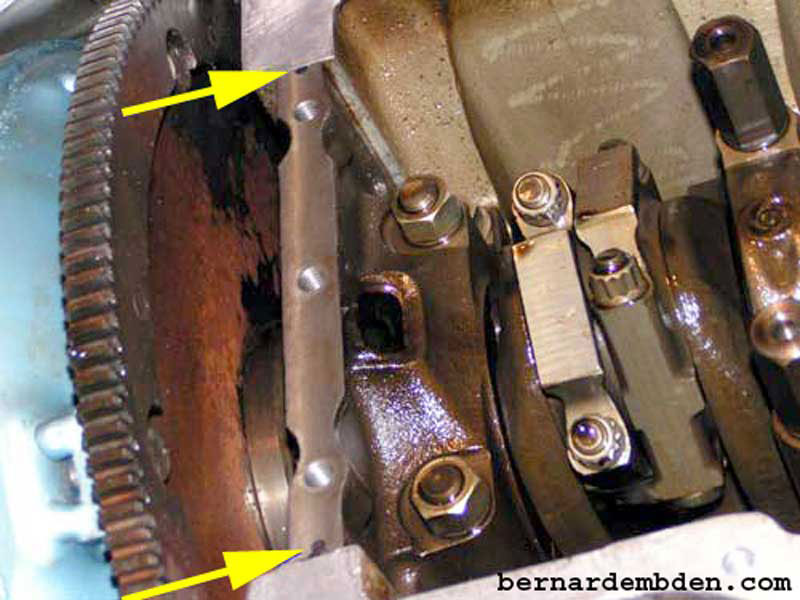
Note: It's good practice, whenever any sealing bolt threads are exposed, to coat the threads with thread sealer. (red arrows indicate some of the bolt positions) This added step ensures that, in this case, if the gasket fails between the bolt and the oil, the oil will not migrate up through the bolt threads and exit the engine. Use a dedicated thread sealer for this step, making sure you coat all the affected bolt threads prior to installation.

Install the oil pressure relief valve pipe from the oil filter assembly to the sandwich plate. Even if they look brand new, do not reuse the old hoses. Use new hoses designed to handle engine oil.
Install oil pan baffle.
Install oil cooler return line fitting. Note that the holes on this fitting is significantly larger that the attachment bolts that go through them. (yellow arrow photograph below). This is important. The fitting must be centered to the oil pump suction fitting inside the engine. The larger holes then allow this fitting to stay "centered" as it's bolted to the sandwich plate.
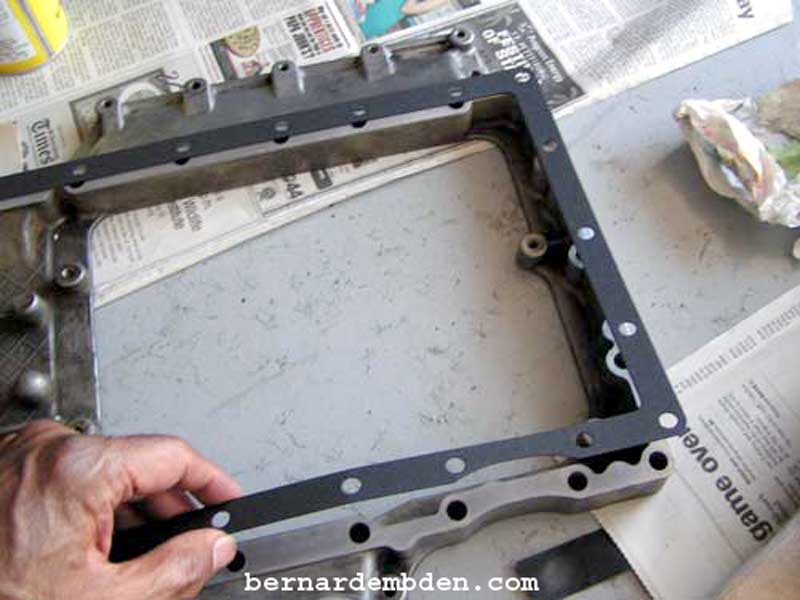
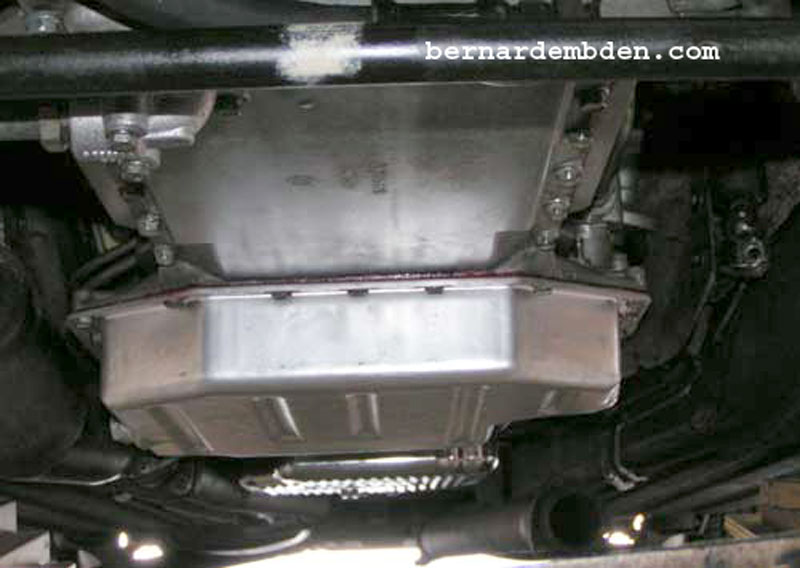
Install oil pan. I took this opportunity to paint the oil pan. Since silver was the only color I had in the garage, silver it is.

Project complete.
Although not a technically difficult project, it is a somewhat physically demanding, time consuming project.
